Here Comes the Sun Blog Hop
Welcome to our Technique Blog Hop! This month we are highlighting the Sunburst Background. This blog hop is a great big circle so you can start wherever you want and continue through to see all the fabulous artwork incorporating this technique. If you are coming from Melissa Robinson’s Blog, you are on the right track!
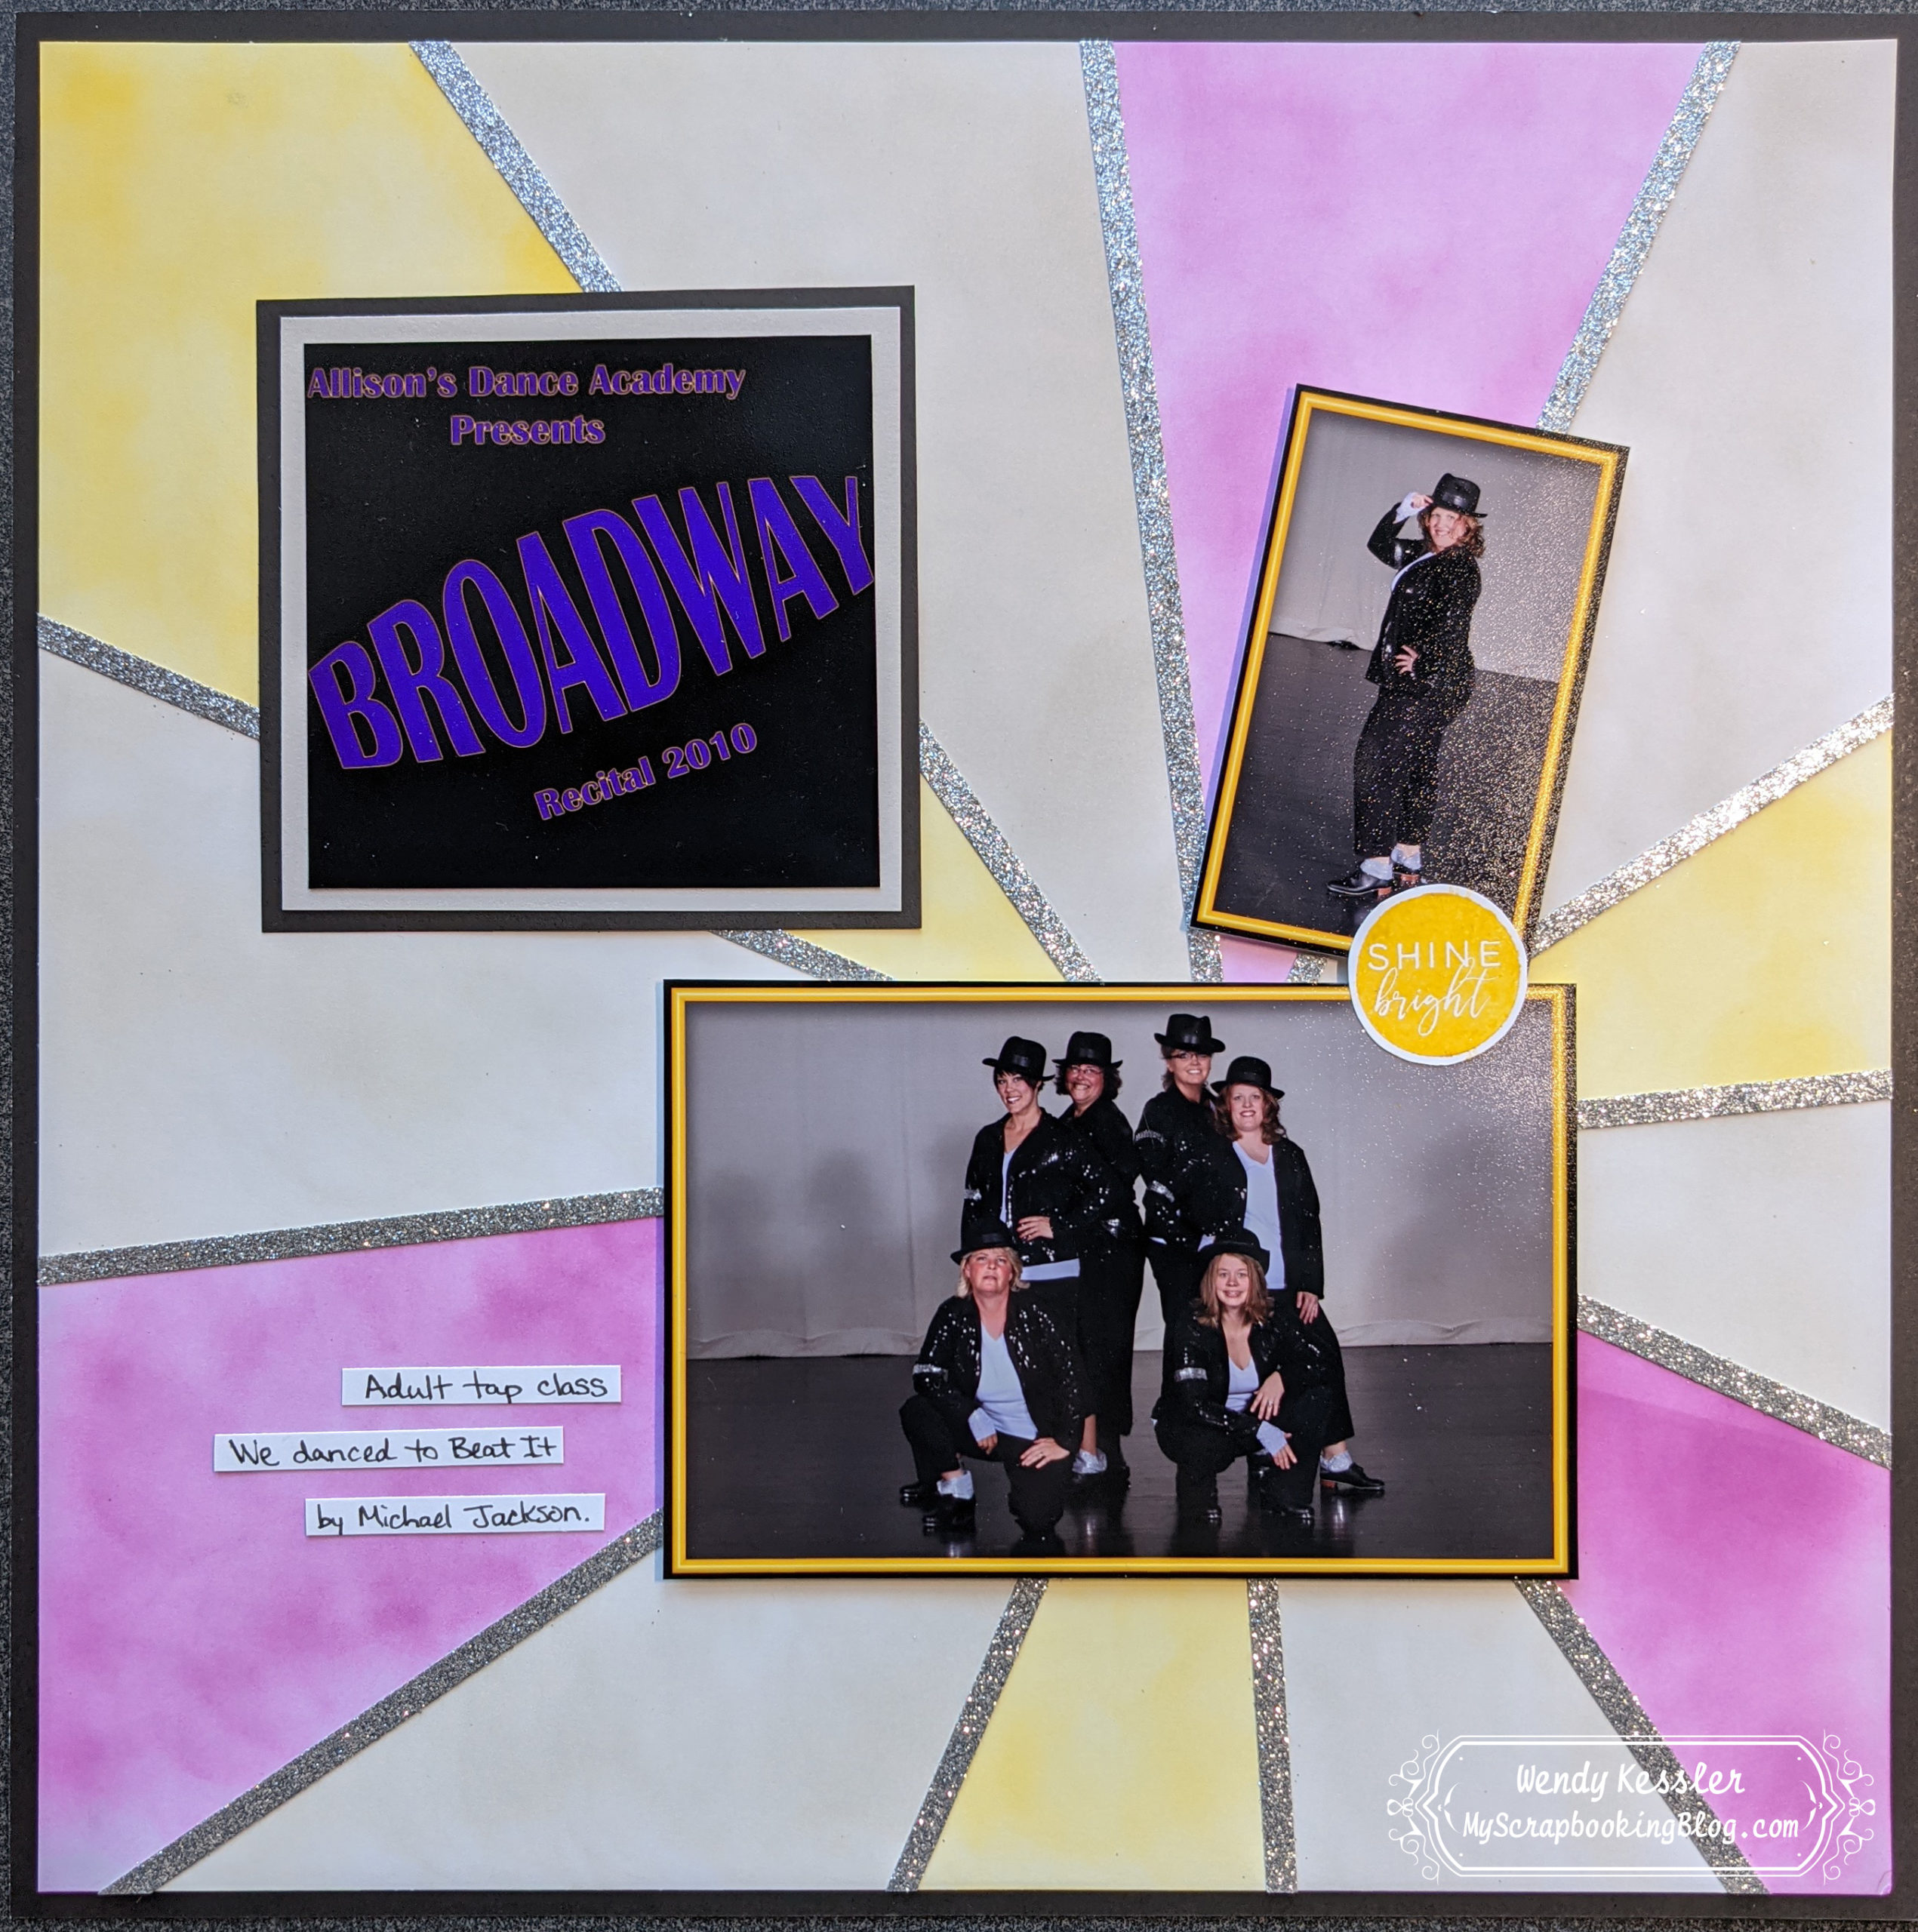
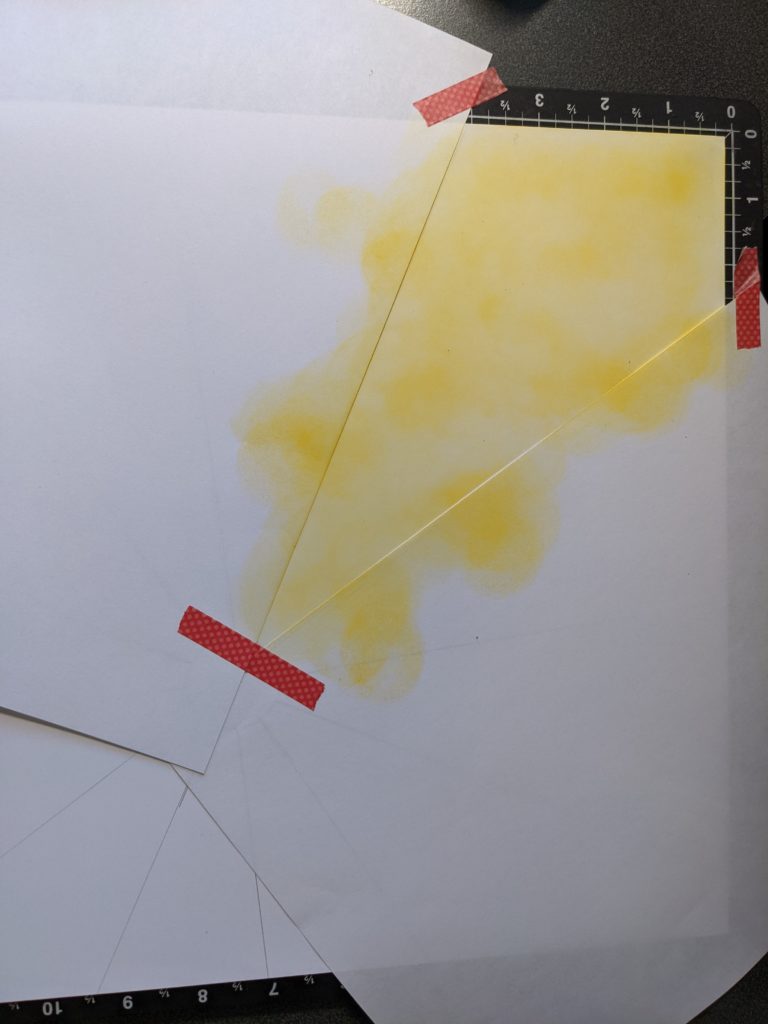
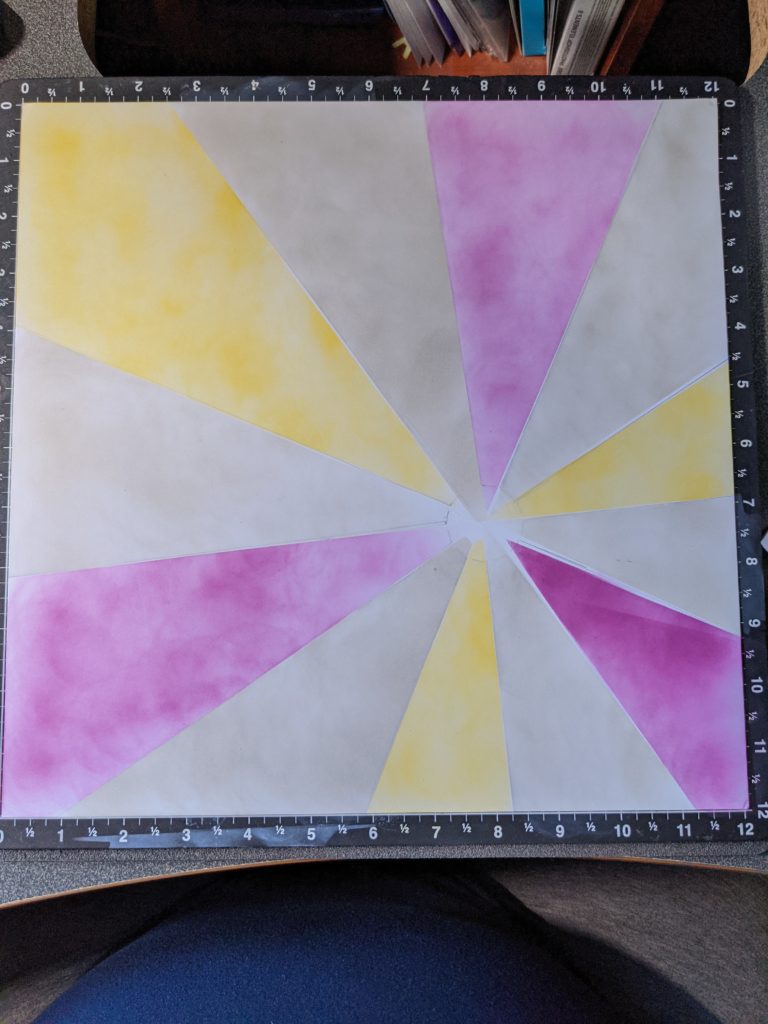
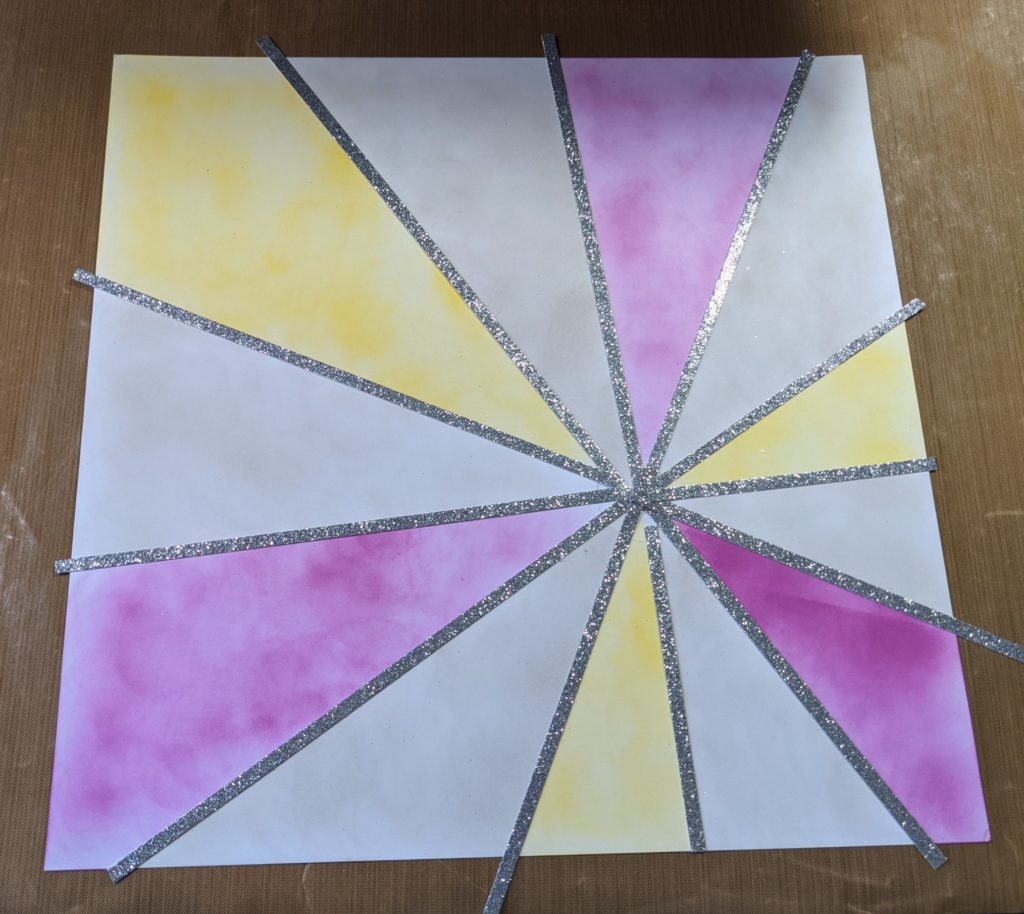
I really wanted to create a sunburst on a layout and achieved this by using the Sunburst Background Thin Cuts as a template. To do this, first decide where you want the center focal point and start there. Draw lines with pencil around the circle and on one side (always the same side) of the diecut. Next, extend the lines using a ruler.
TIP: If you want a symmetrical look with multiple colors, there are 12 sections so use 2, 3, 4, or 6 different colors.
Originally, I chose yellow, purple, gray, and black. However, I decided more gray would be better with the black lines.
I cut 3/8″ strips of silver glitter paper to go along the lines. I’m undecided on if I should add embellishments or leave it as is. Currently, it really showcases the starburst.
Other TIPS:
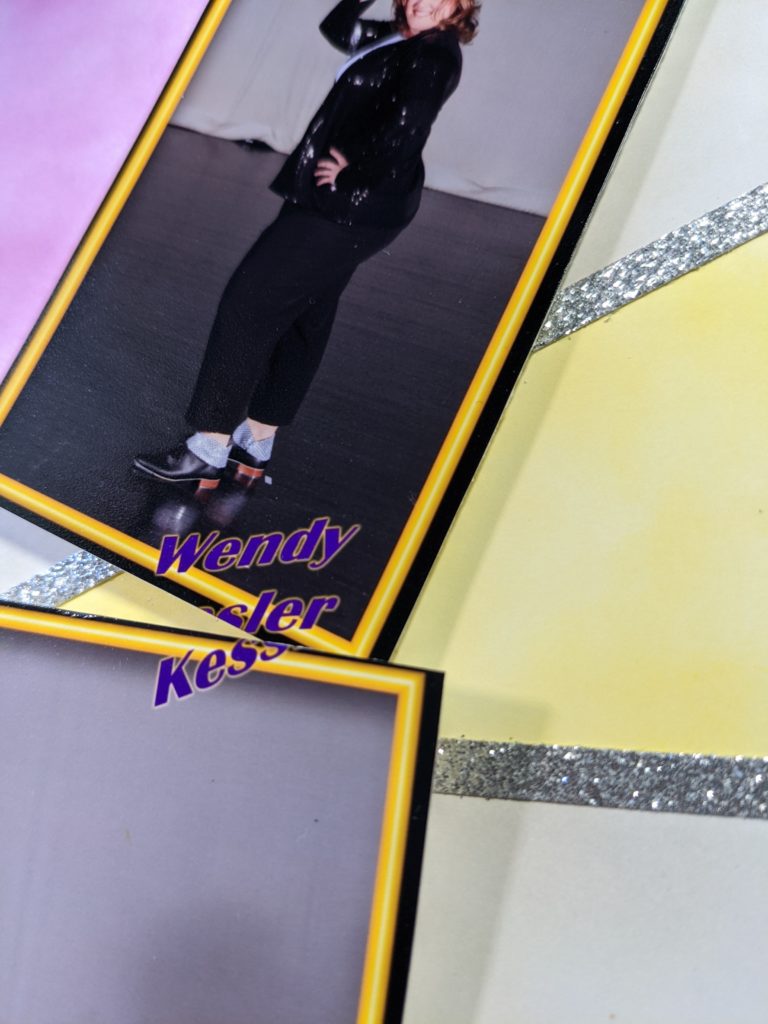
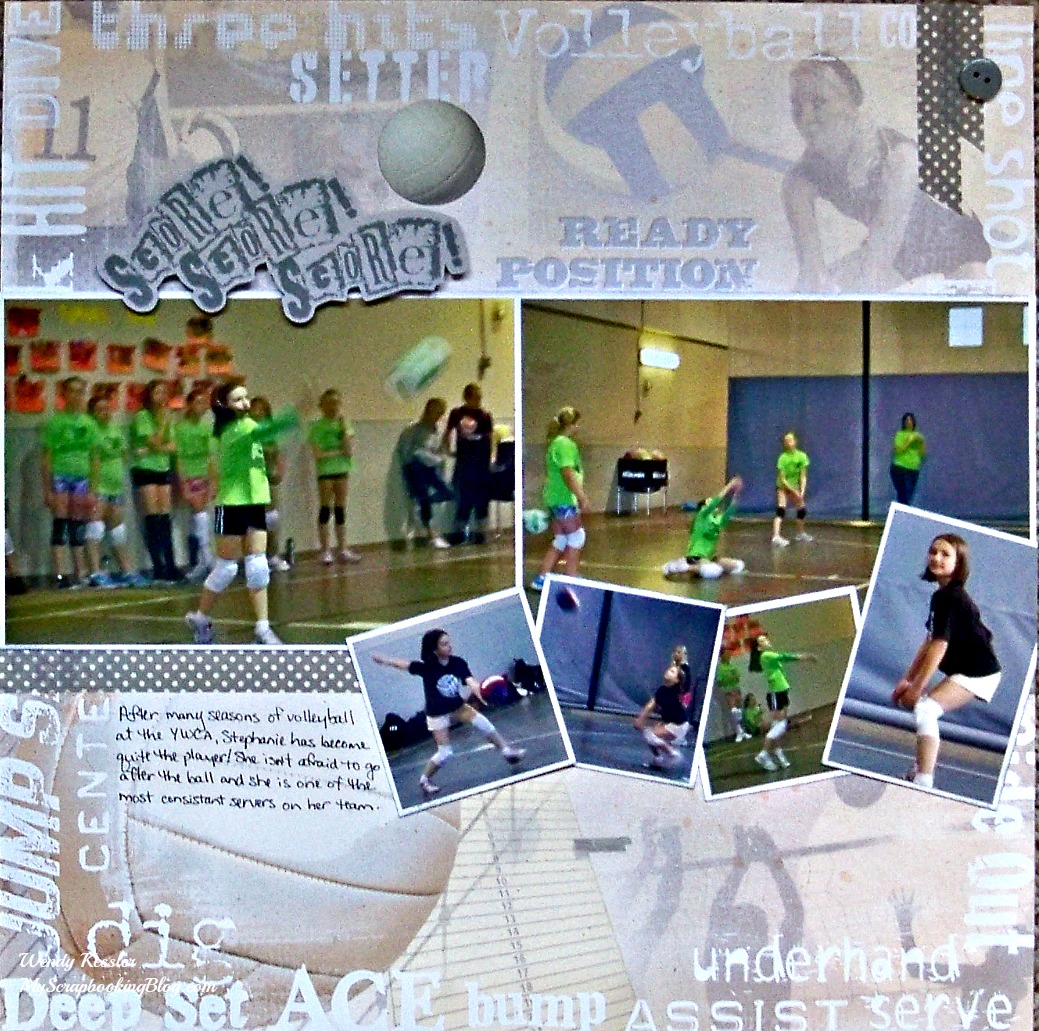
I used 3D Foam tape to make the photos pop.
These photos are from a memory mate that I cut up. The circle stamp hides my name.
Supply List: Sunburst Background Thin Cuts, Pumice Stone Distress Oxide Ink, Seedless Preserves Distress Oxide Ink, Mustard Seed Distress Oxide Ink, Silver Glitter Paper, Mink Cardstock, Black Cardstock, White Daisy Cardstock, Spot-on Sentiments stamp set,
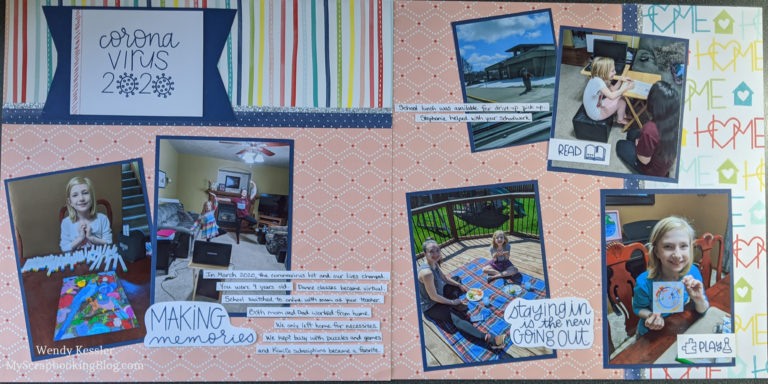
Here are some photos of how I did things along the way:

Thanks for stopping by! Please continue onto Cat Nowak’s Blog where you will find some additional artwork highlighting this technique! Be sure to leave a comment and let me know what you thought of my variation and happy hopping!

I love what you did and especially LOVE the photos! 😉 I took tap (and ballet) many many years ago.
Great way to do this for a layout! Love it!
Seriously though, the added shimmer was the perfect touch! Great layout.
What a fun technique! I love your page!
Great layout! It is perfect for the photos!
This strips of glitter are perfect for this layout!
What a fun layout and I love how you created the rays with inking. This layout is perfect for the photos.
What a great design! Thanks for sharing how you made it.
What an awesome layout! Thank you for sharing your tutorial also!