Confetti Wishes Scrapbooking Workshop

On April 10, we will be creating the Confetti Wishes Scrapbooking Workshop.  If you are in Club, this is the time to order.  You need to order by March 6 by contacting me or joining the correct gathering on my website to receive it by the scheduled workshop date.
The Confetti Wishes Scrapbooking Workshop Kit includes:
1  – My Reflections Confetti Wishes Paper Packet (X7189B)
1 – My Acrylix Confetti Wishes Workshop Stamp Set (D-size)
4 – Cardstock Sheets (2 Kraft, 2 White Daisy)
1 – Confetti Wishes Assortment (Z2044)
1 – Gold Shimmer Trim (Z1985)
1 – Instructional Brochure
Basic Workshop on the Go supplies: All Workshops On the Go Kits use some or all basic supply items which I recommend you bring with you.  These items include a paper trimmer, scissors, sponge, piercing and embossing tool kit, My Acrylix blocks for stamping, and adhesives of your choice (which may include Liquid Glass, Glue Dots, 3-D Foam, etc.)
Additional Supplies required to complete:
Canary Exclusive Inks Pad (Z2643)
Pacifica Exclusive Inks Pad (Z2192)
Pear Exclusive Inks Pad (Z2197)
Thistle Exclusive Inks Pad (Z2640)
Coordinating products:
Confetti Wishes Complements (X7189C)
Purple Glitter Paper (Z1992)
Thistle Diagonal Striped Ribbon (Z1990)
Build-a-Cake Stamp Set (D1618)
Lovely Birthday Stamp Set (B1462)
Puppy Party Stamp Set (B1464)
Colors (for cardstock, inks, and markers):
Canary, Crystal Blue, Lagoon, Pacifica, Pear, Thistle, Whisper, White Daisy
When you place an order of $50 or more, you get the Stamp of the Month set for only $5.
The Stamp of the Month is:
(February) A Happy Hello
(March) Choose Happy
*The Stamp of the Month may vary depending on your purchase date.  If you order online, it will be the month in which you are purchasing.  If you order by contacting me, it will be (March) Choose Happy.
The current Constant Campaign is:
(February) Album Allure
(March) Recruiting on a Roll
*The Constant Campaign you qualify for may vary depending on your purchase date.  If you order online, it will be the month in which you are purchasing.  If you order by contacting me, it will be Recruiting on a Roll.
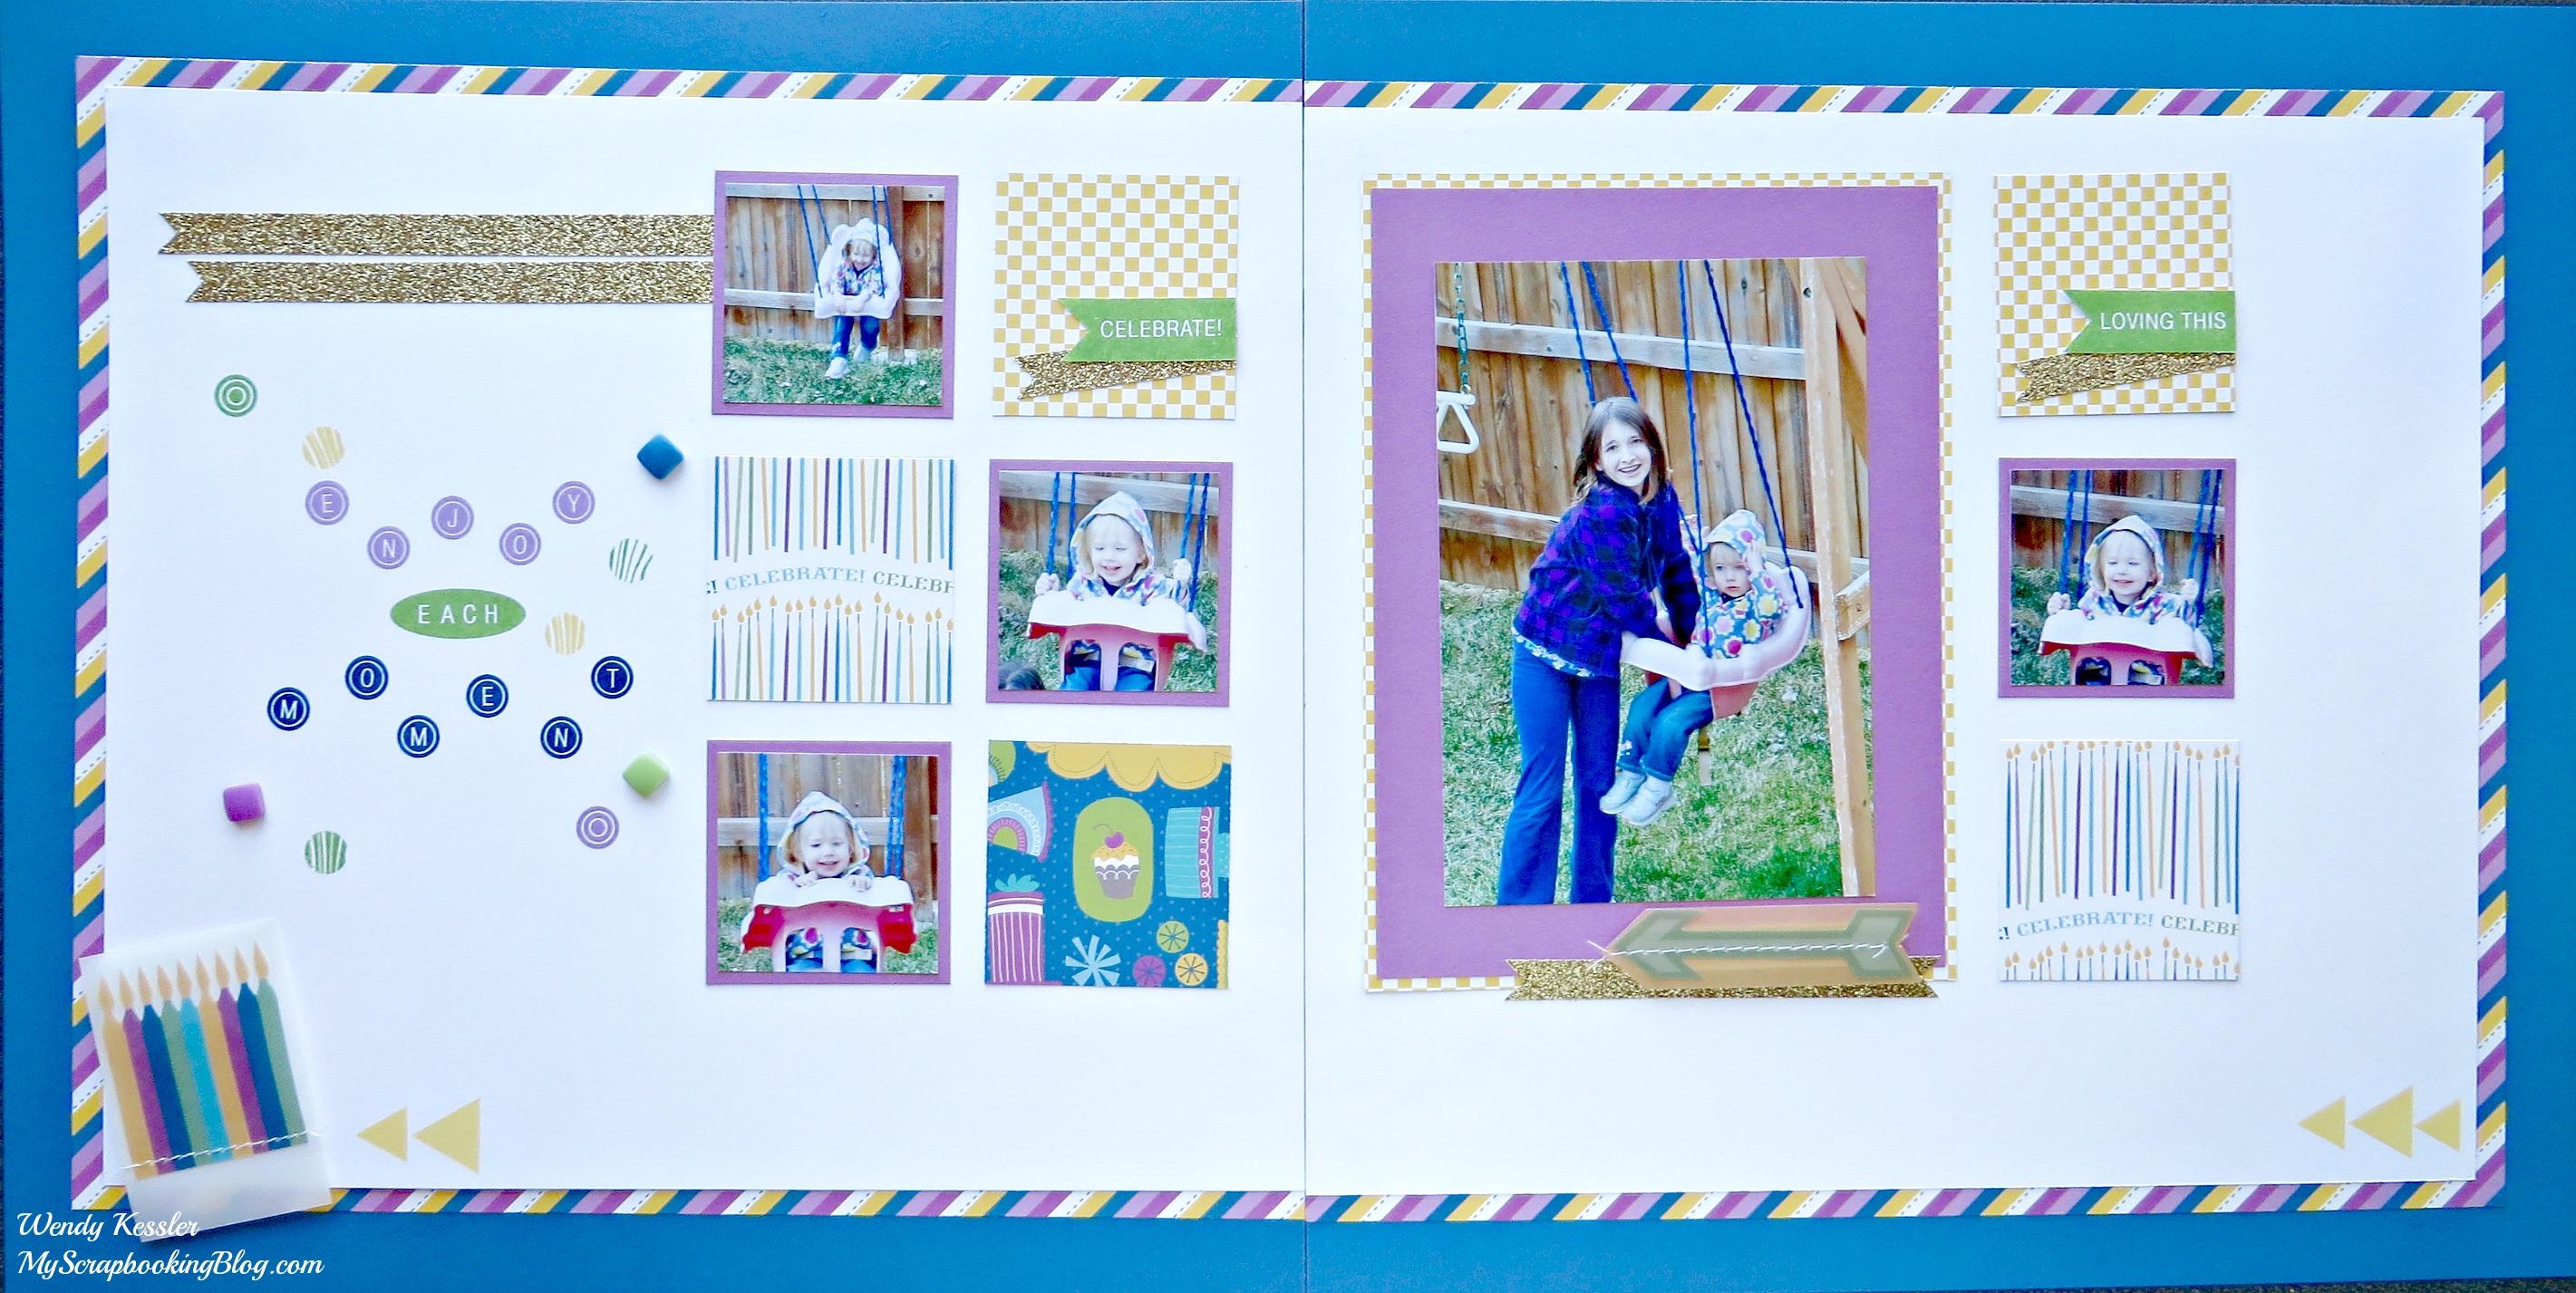
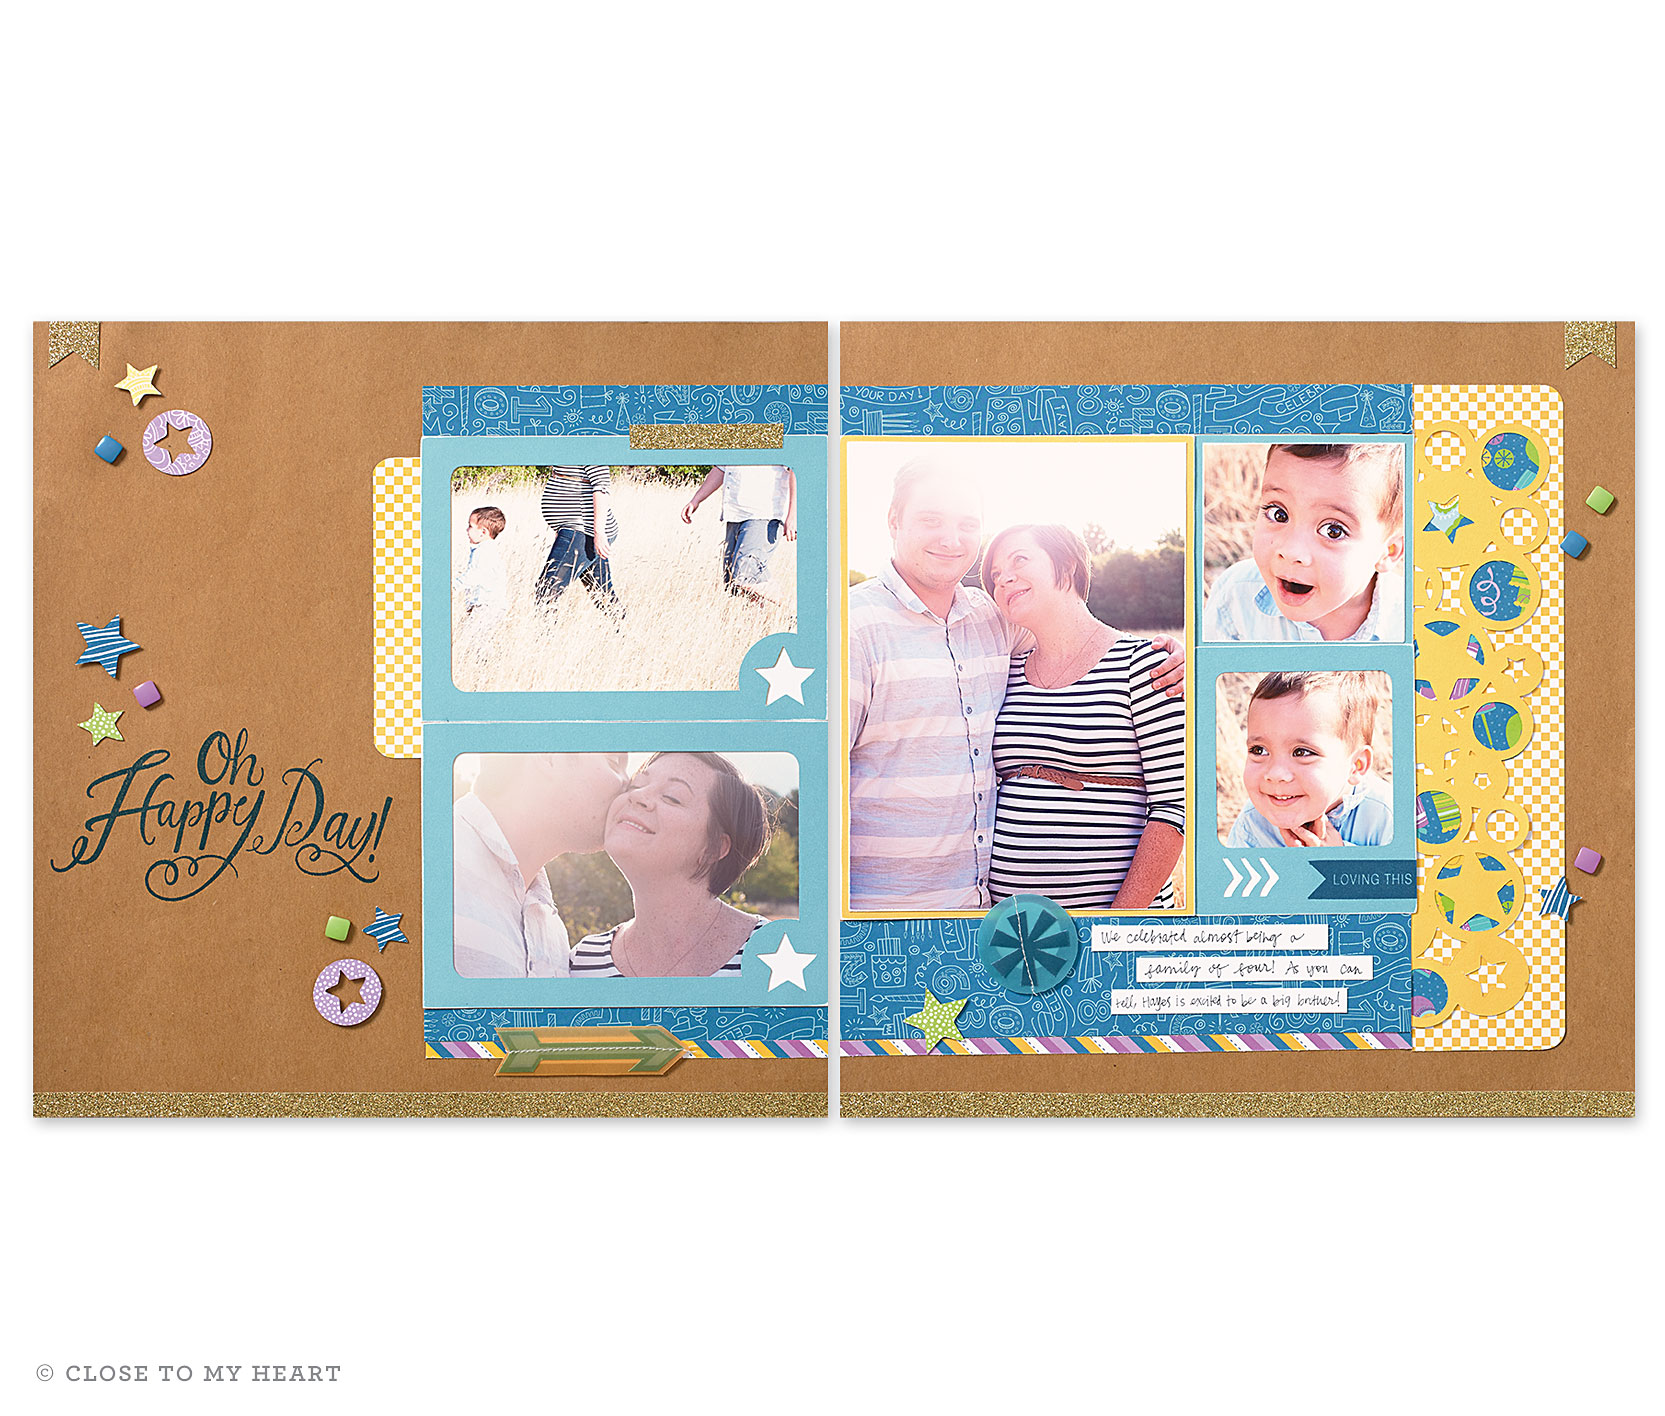
Tips for these layouts:
*(Layout 1) When cutting the Crystal Blue, cut the Cricut cuts first, then you can use one of the scraps from the inside of the frame to cut the 3 1/4 square.
*(Layout 1) When cutting, note that the blue birthday patterned paper is an Accent.  You may not want to cut this and just use scraps later.
*(Layout 1) Double check the layering and spacing when applying the papers on the left page with the overlay.  It can be a bit tricky.
*(Layout 2) You may want to cut out the center of the Diagonal Stripes patterned paper to avoid waste and save it for another project.
*(Layout 2) For the perfectly matched banner, cut two pieces of Shimmer Trim and hold them back to back before cutting the angle.
*(Layout 2) For the title, first place the letters down on your page where you want them, then place an acrylic block overtop so they stick to it.  Now you can ink it and they will stamp right where you want them!
Additional Layout: (directions on my website)
Here are the layouts as I completed them.  On the second I moved around the pieces to accommodate my photos and on the first one, I did put Shimmer Trim across the second page as well, but didn’t notice it until after I took the picture (and too lazy to take a new one!).