Convert a Sketch
Do you use sketches? Have you ever thought to convert a sketch one to suit your needs? Let me explain what I mean… I will interchangably use card sketches for layouts or…
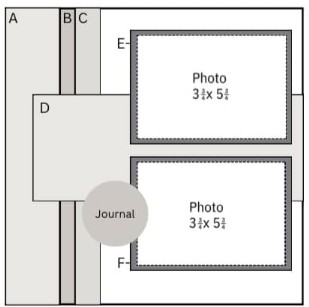
Do you use sketches? Have you ever thought to convert a sketch one to suit your needs? Let me explain what I mean… I will interchangably use card sketches for layouts or…
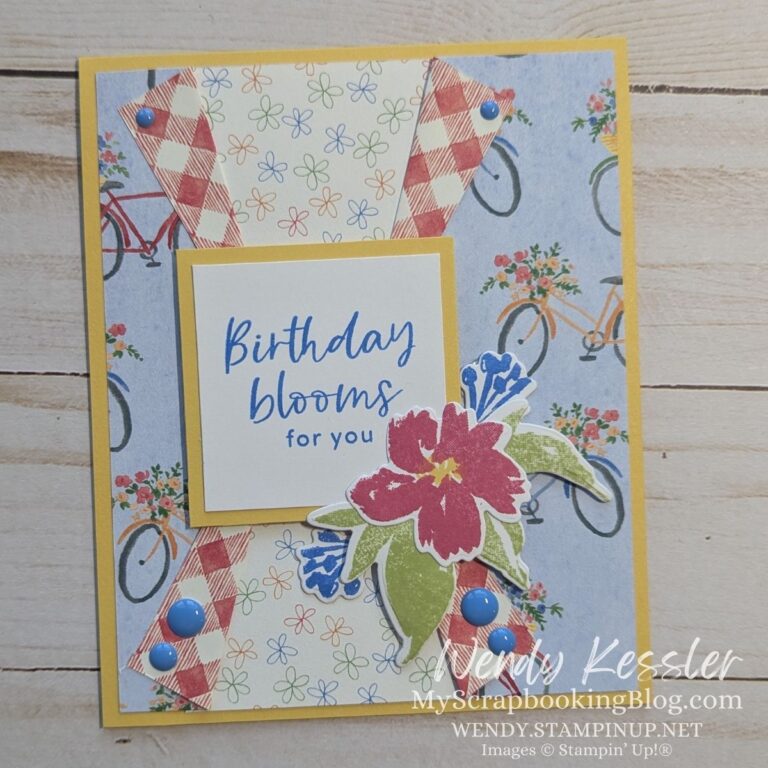
This Birthday Blooms stamp is among one of my favorite sentiments. It’s a bit different than a standard “Happy Birthday” and I often use florals on my cards so it coordinates well…
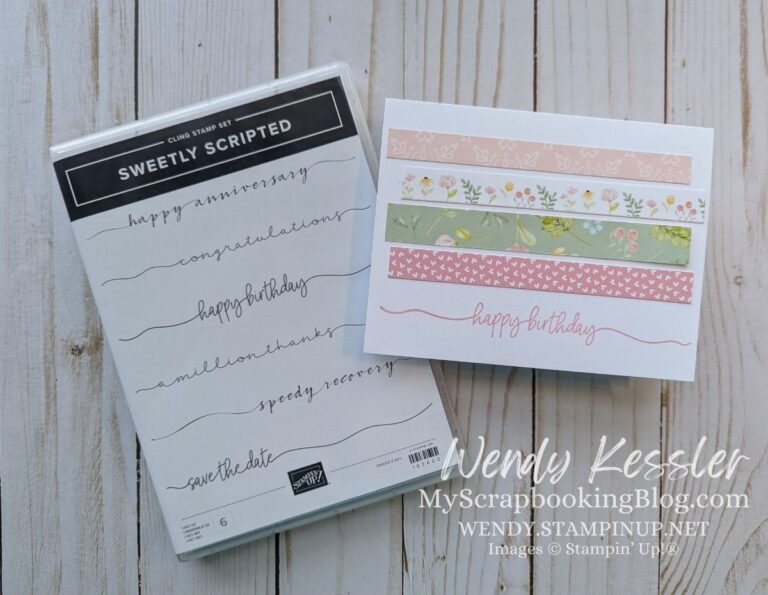
Creating a Beautiful Handmade Card with the Sweetly Scripted Stamp Set Handmade cards are a delightful way to add a personal touch to any occasion, and the satisfaction of crafting something yourself…

Sometimes simple is the way to go, like with this Hello fun fold card. There’s just a touch of stamping on the front, with the majority of the card highlighting that beautiful…
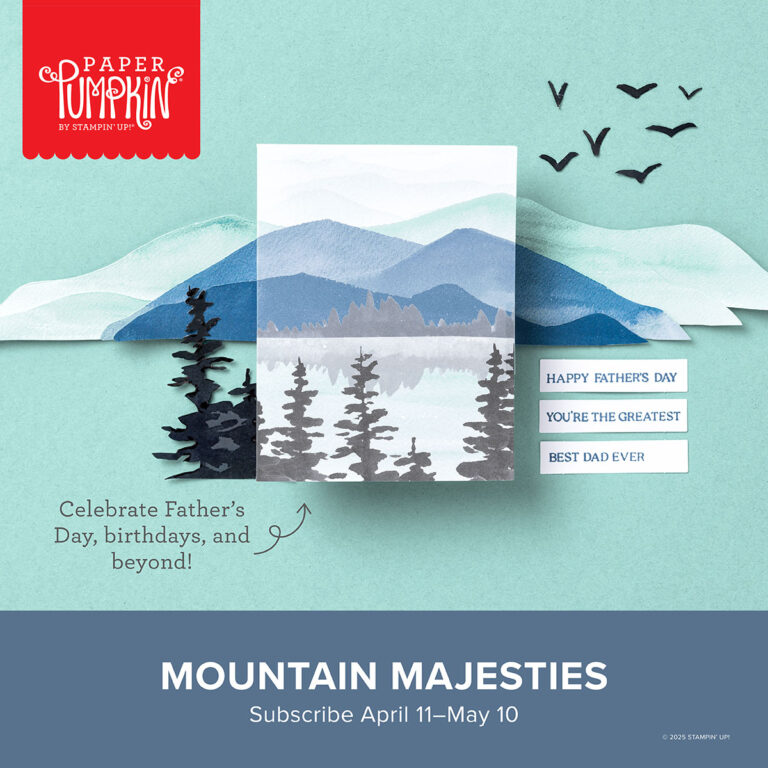
Are you ready for a fresh dose of creativity delivered right to your door? The products in the Mountain Majesties Paper Pumpkin kit will have ties to suites in the catalog, which…