 On August 4, we will be creating the Prickly Pear Workshop Your Way Scrapbooking Kit.  If you are in Club, this is the time to order.  You need to order by July 7 by contacting me or joining the correct gathering on my website to receive it by the scheduled workshop date.
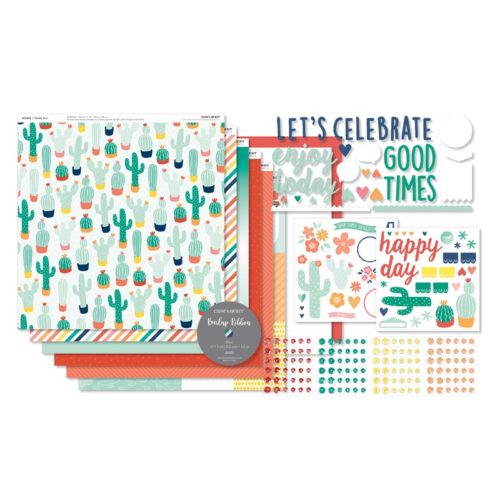
The Prickly Pear Workshop Your Way Scrapbooking Kit includes:
1 – Prickly Pear paper packet (X7221B)
1 – Prickly Pear Complements (X7221C)
4 – cardstock sheets (1 Poppy, 3 White Daisy)
1 – Prickly Pear sequins (Z3324)
1 – blue burlap ribbon (Z3325)
Download Instruction Guide: On my website
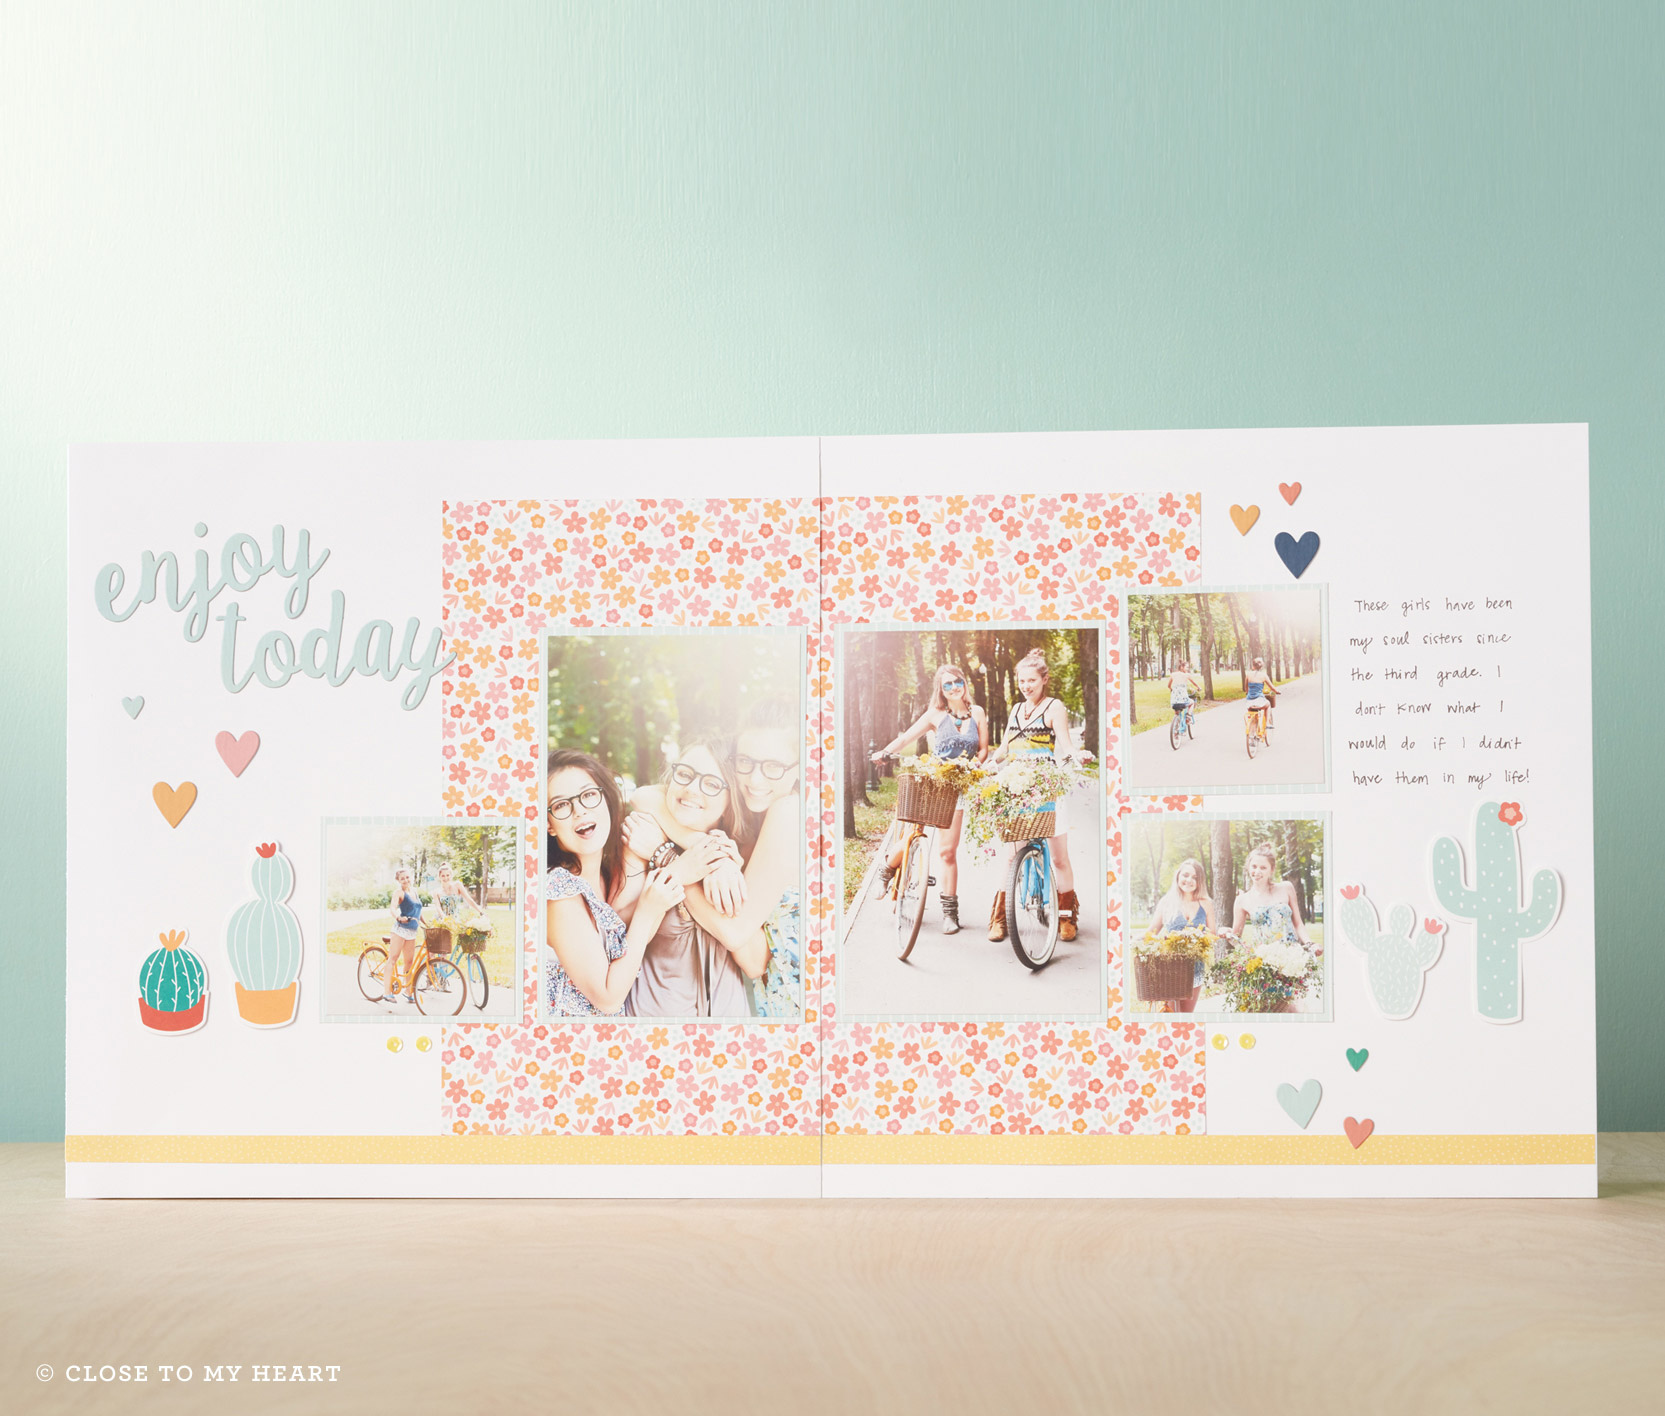
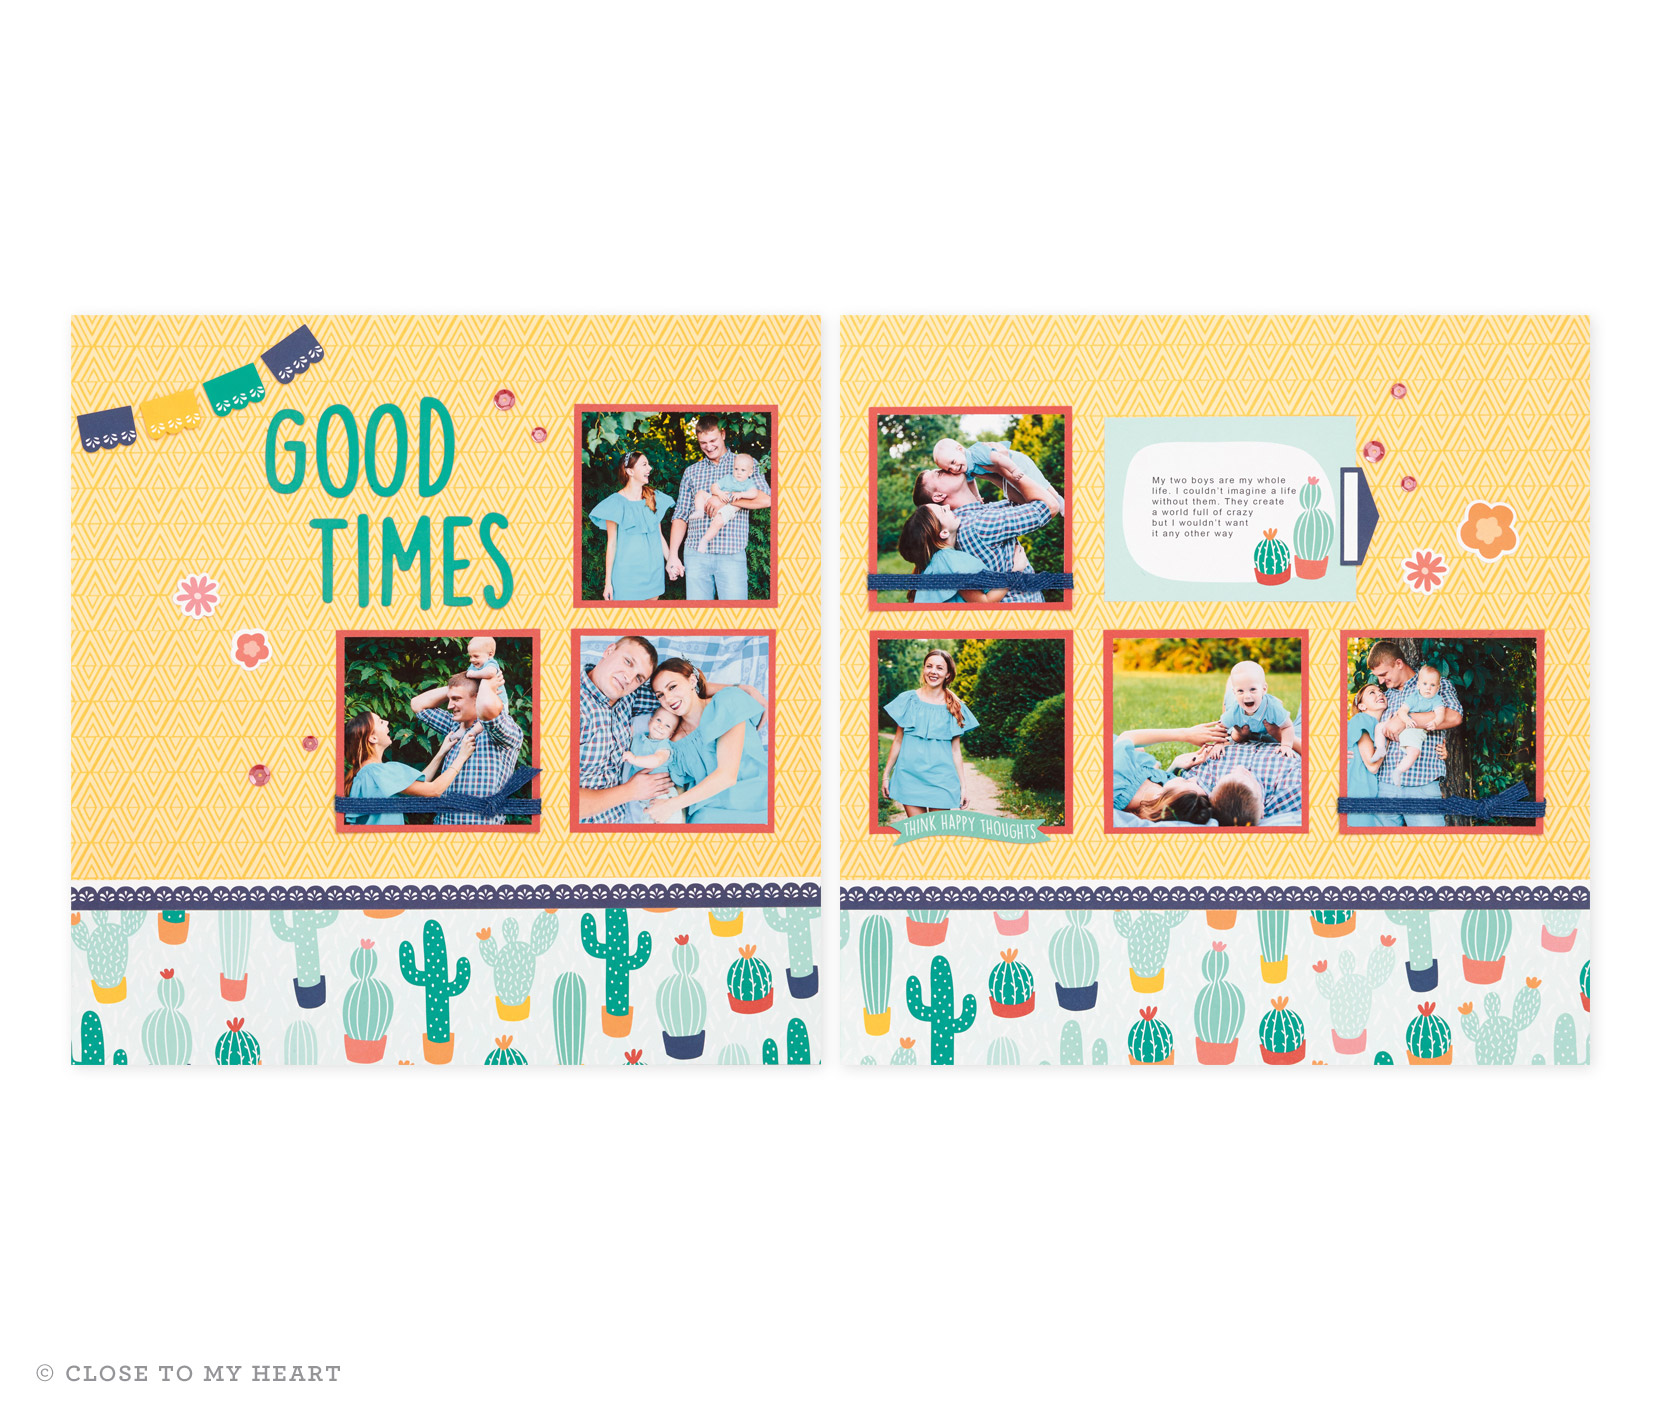
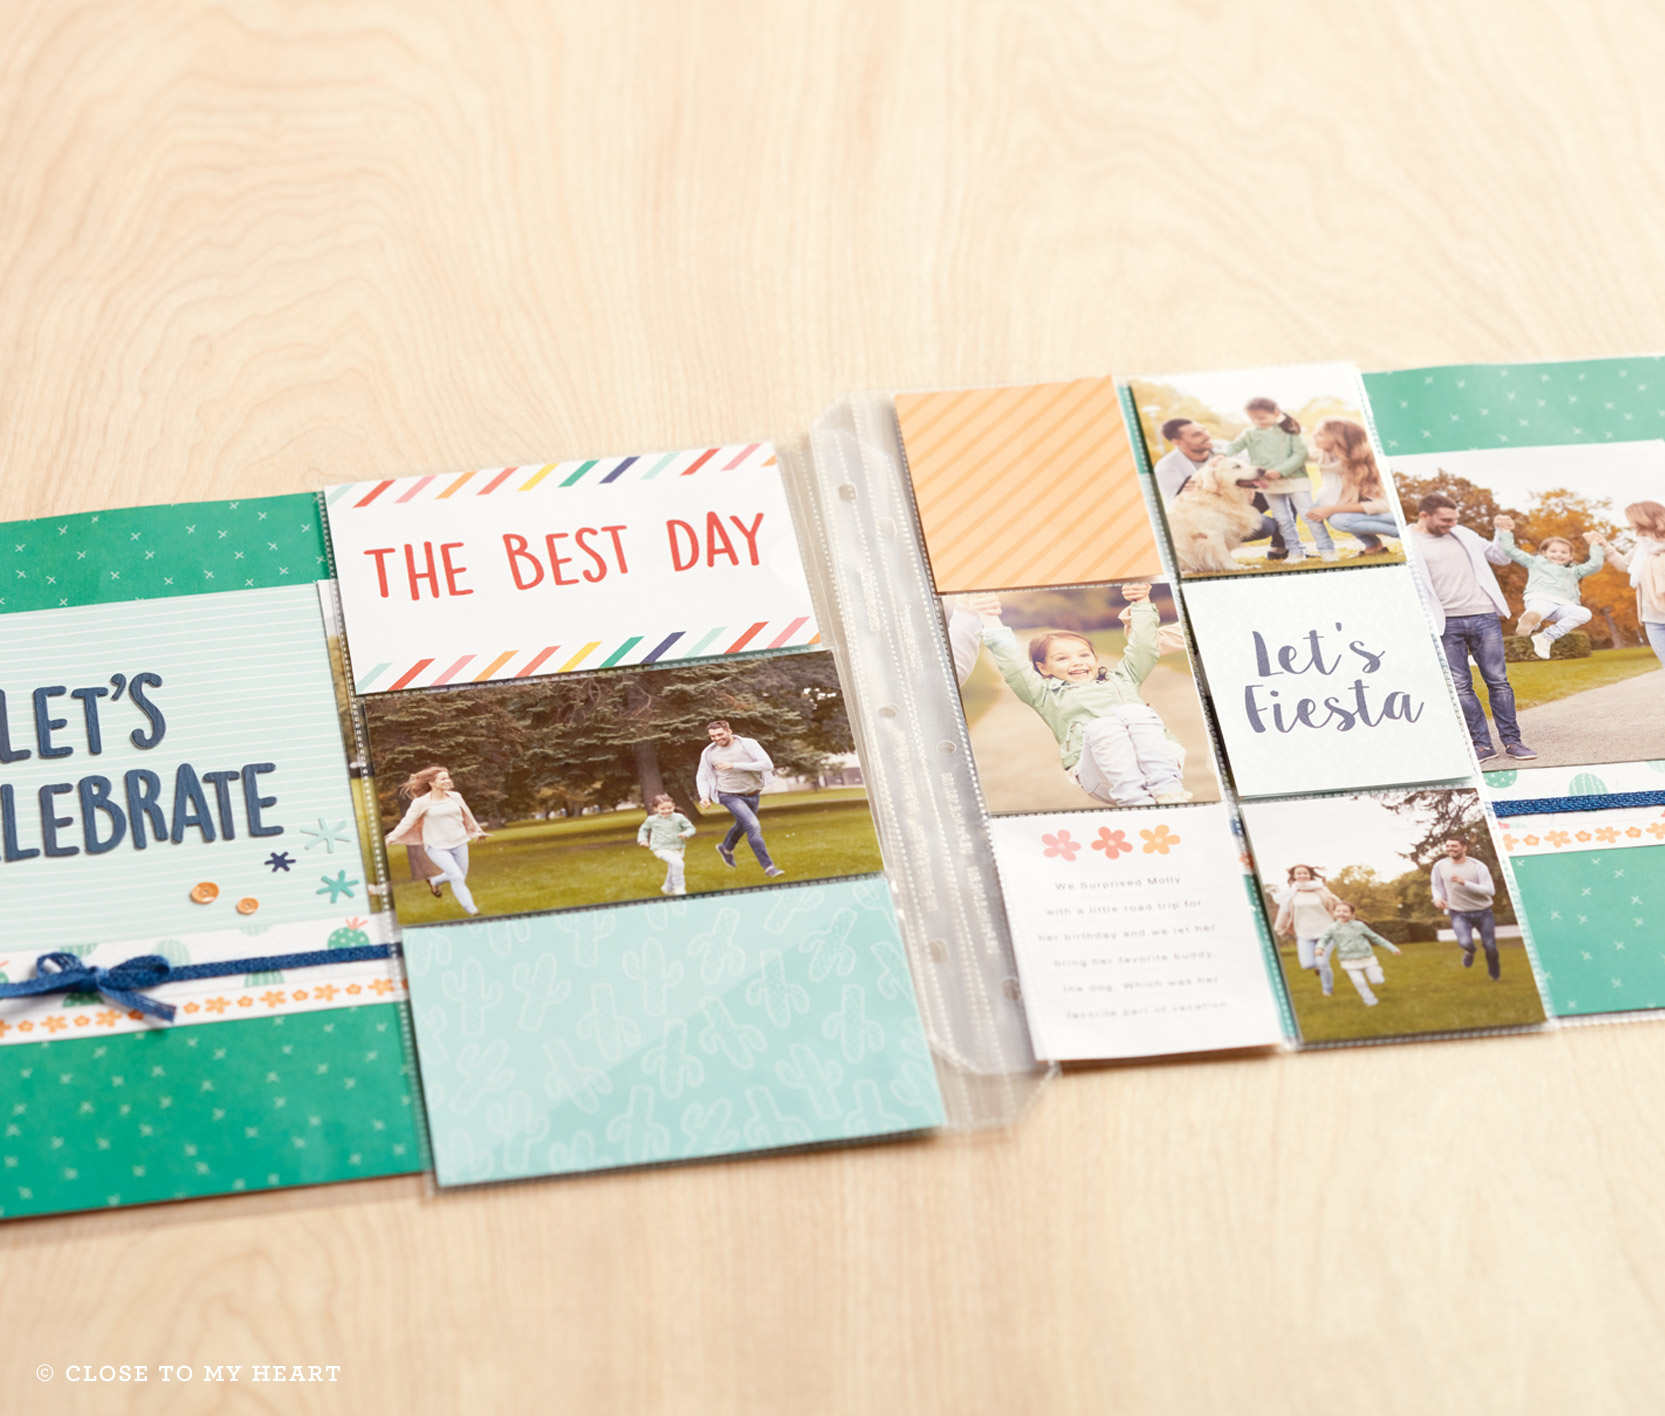
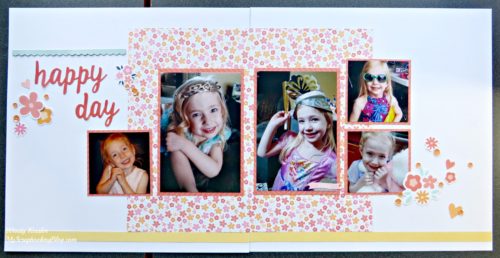
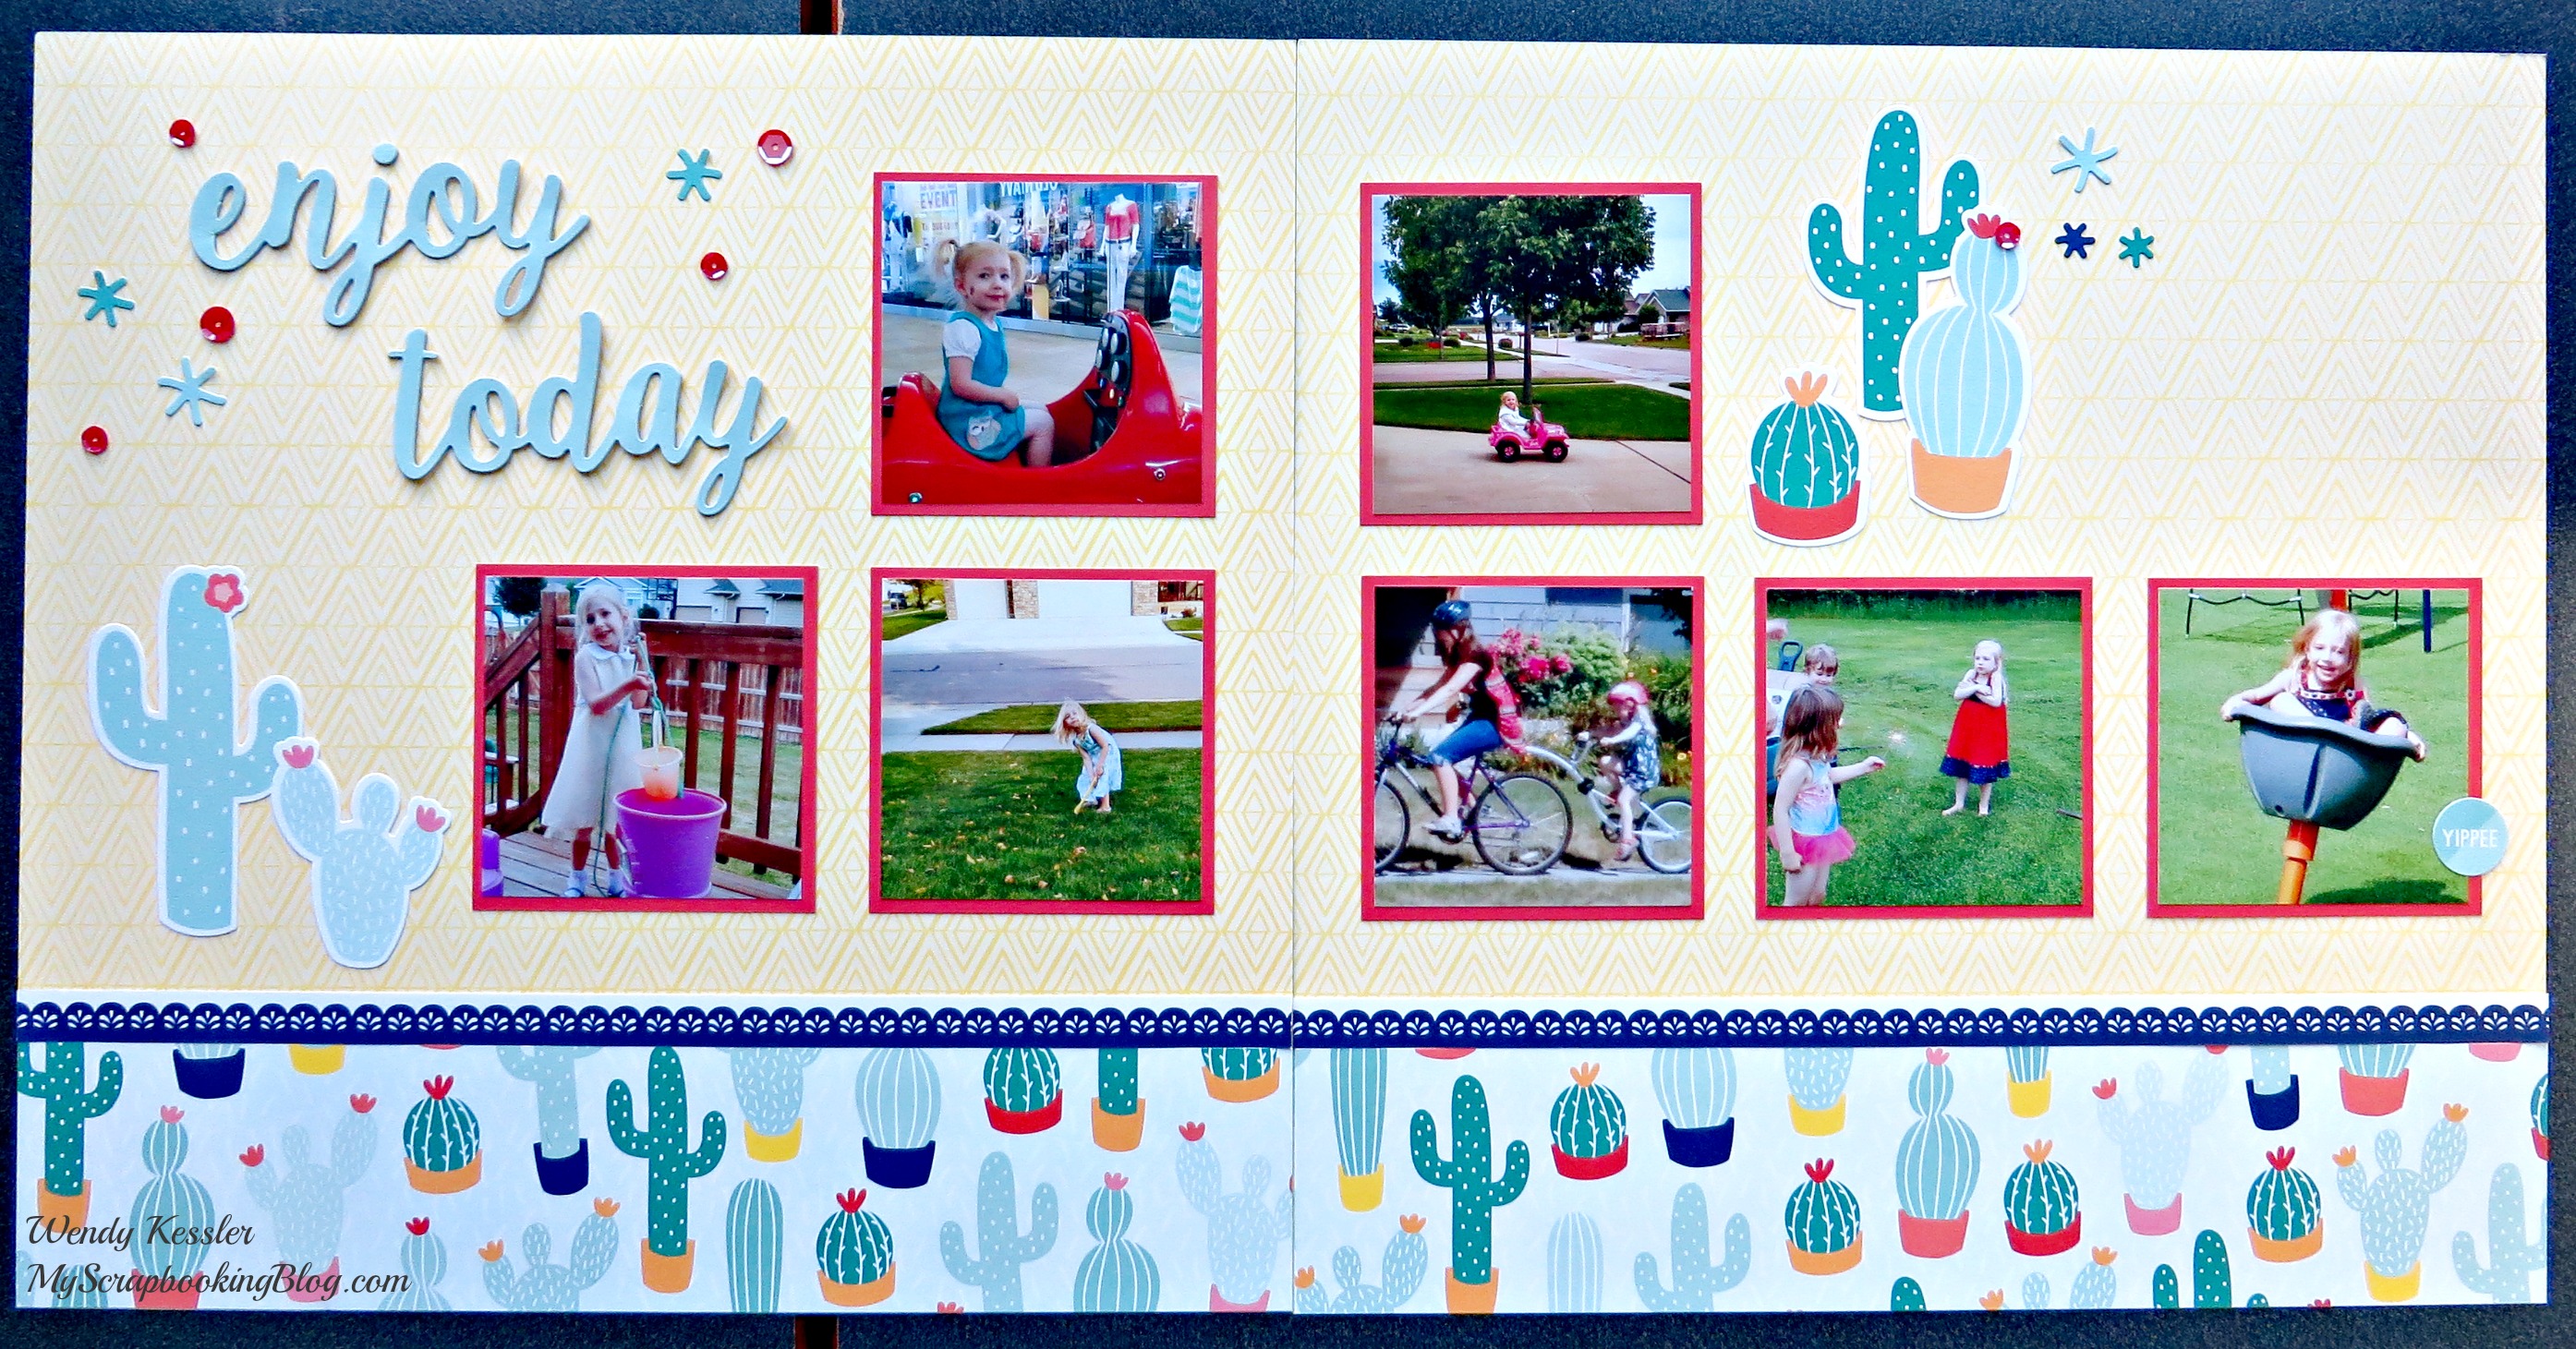
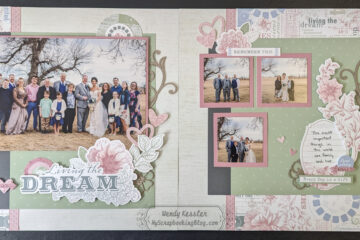
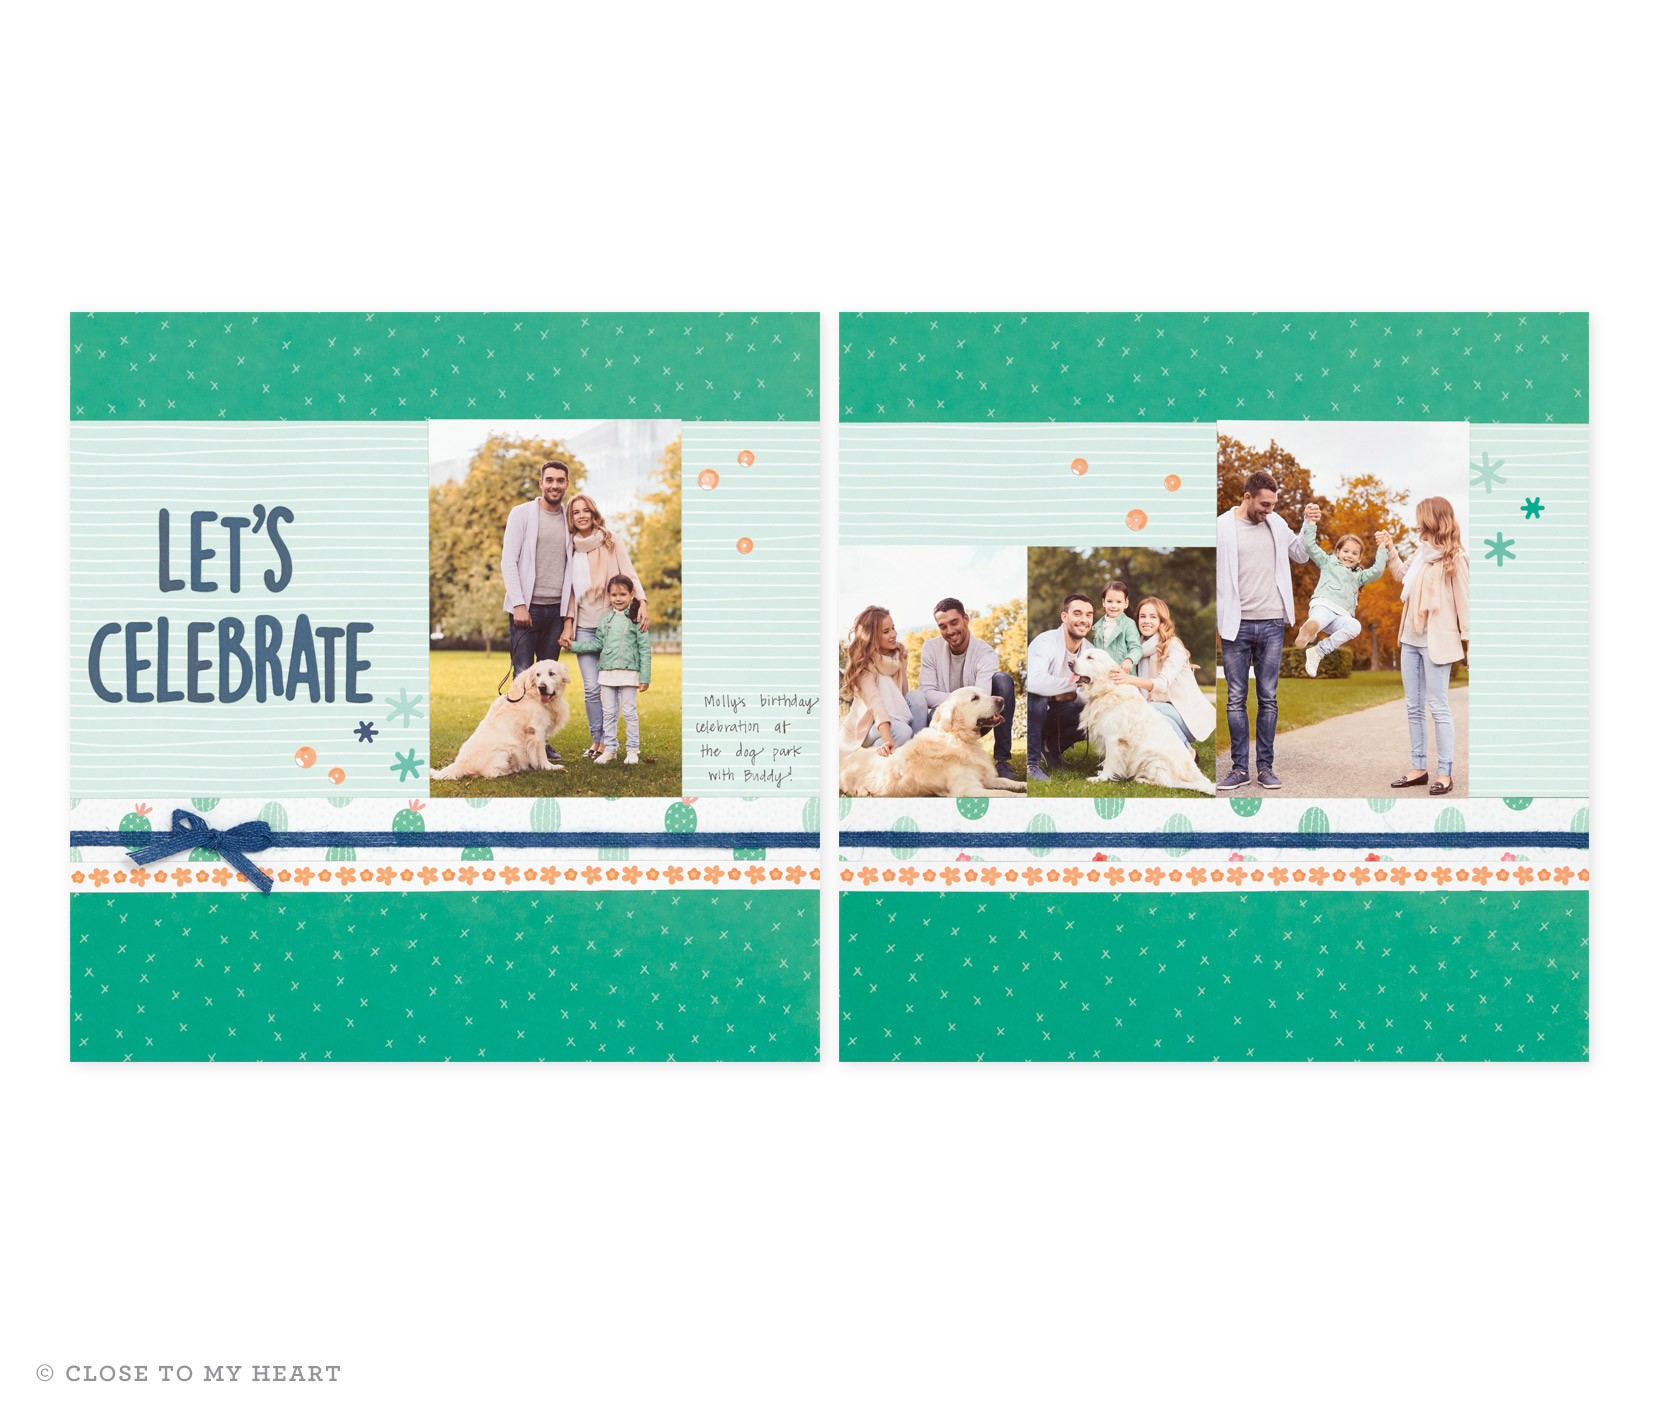 With this kit, you will be able to complete three 2-page layouts (shown above).
Additional Picture My Life Layout: To create the Picture My Life layout for this workshop, simply add:
Pocket Plus Memory Protectors – Design 1
Pocket Plus Memory Protectors – Design 3
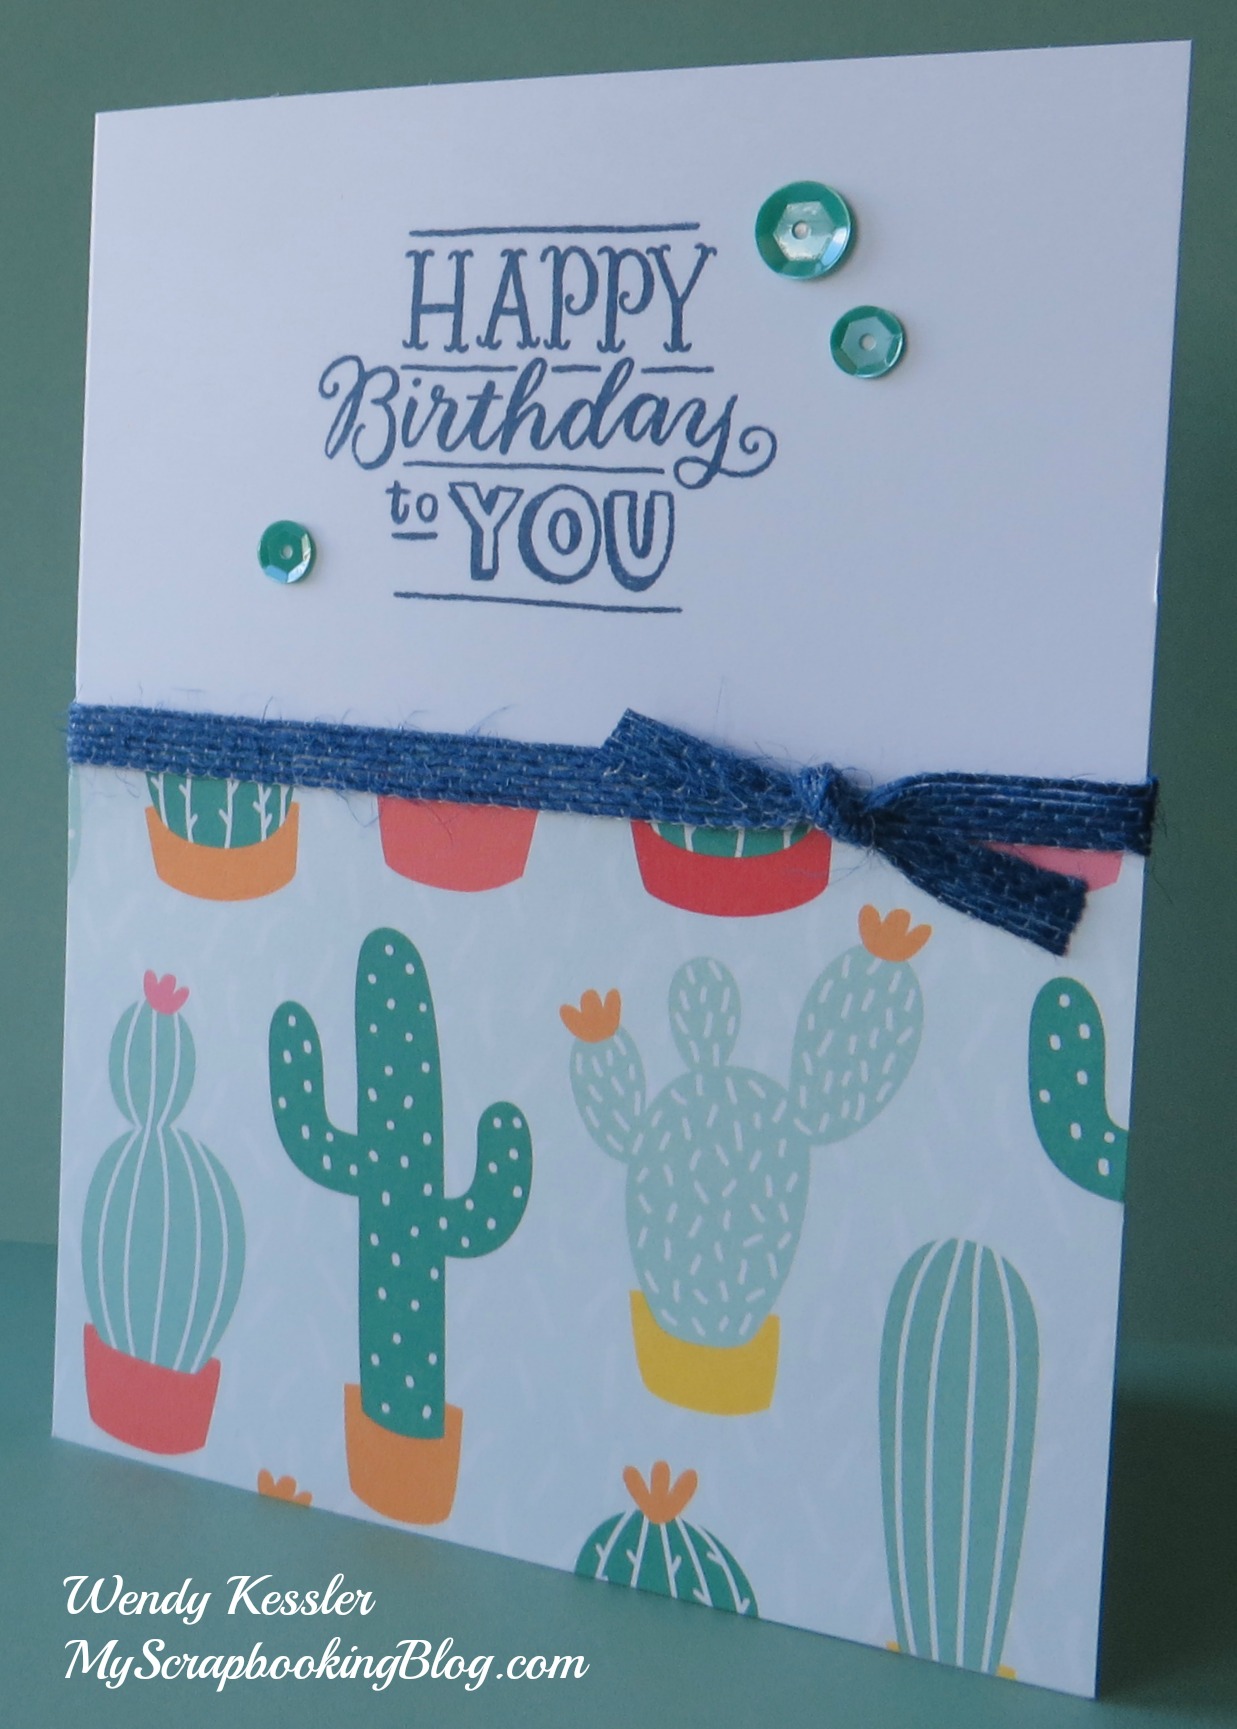
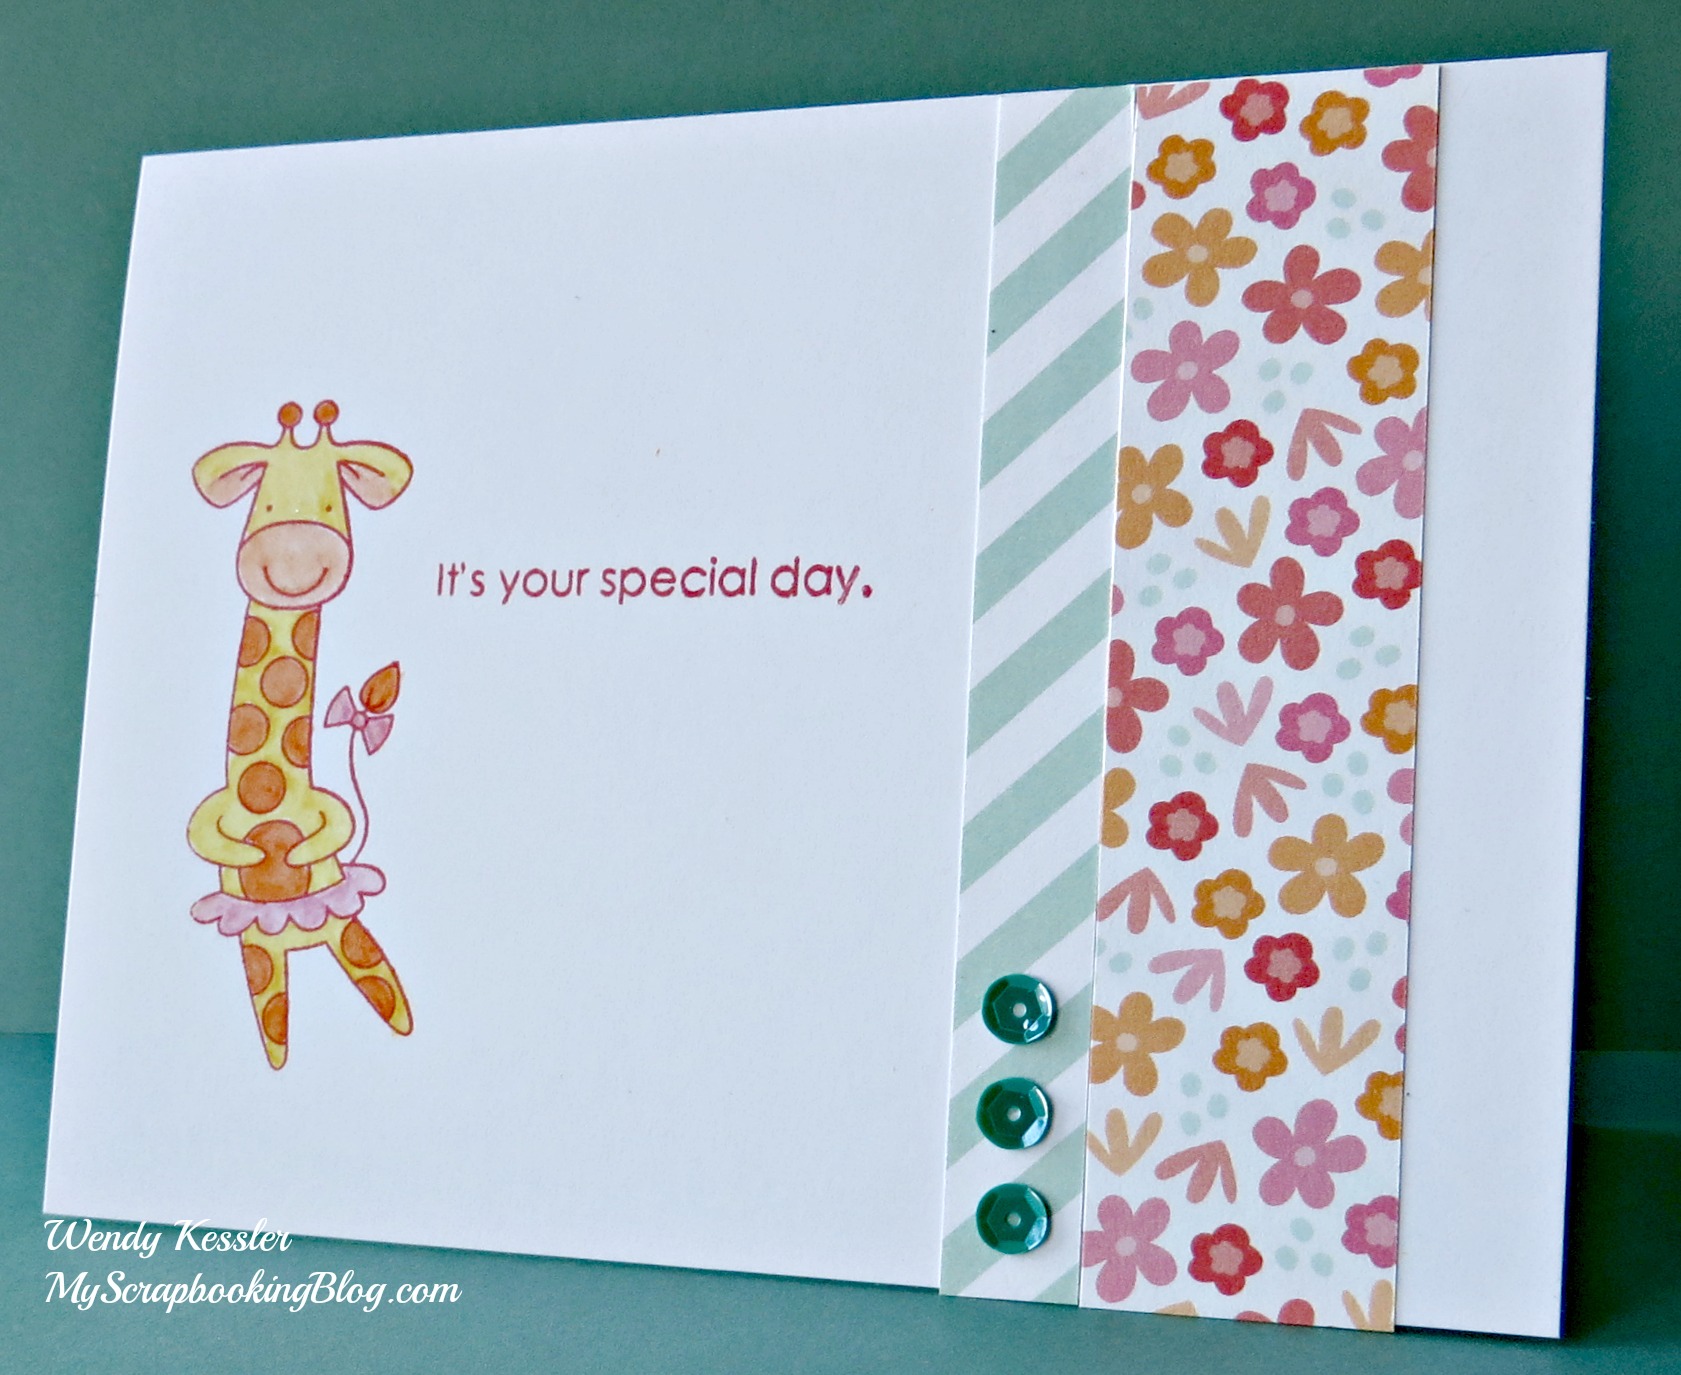
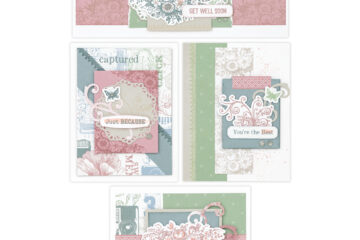
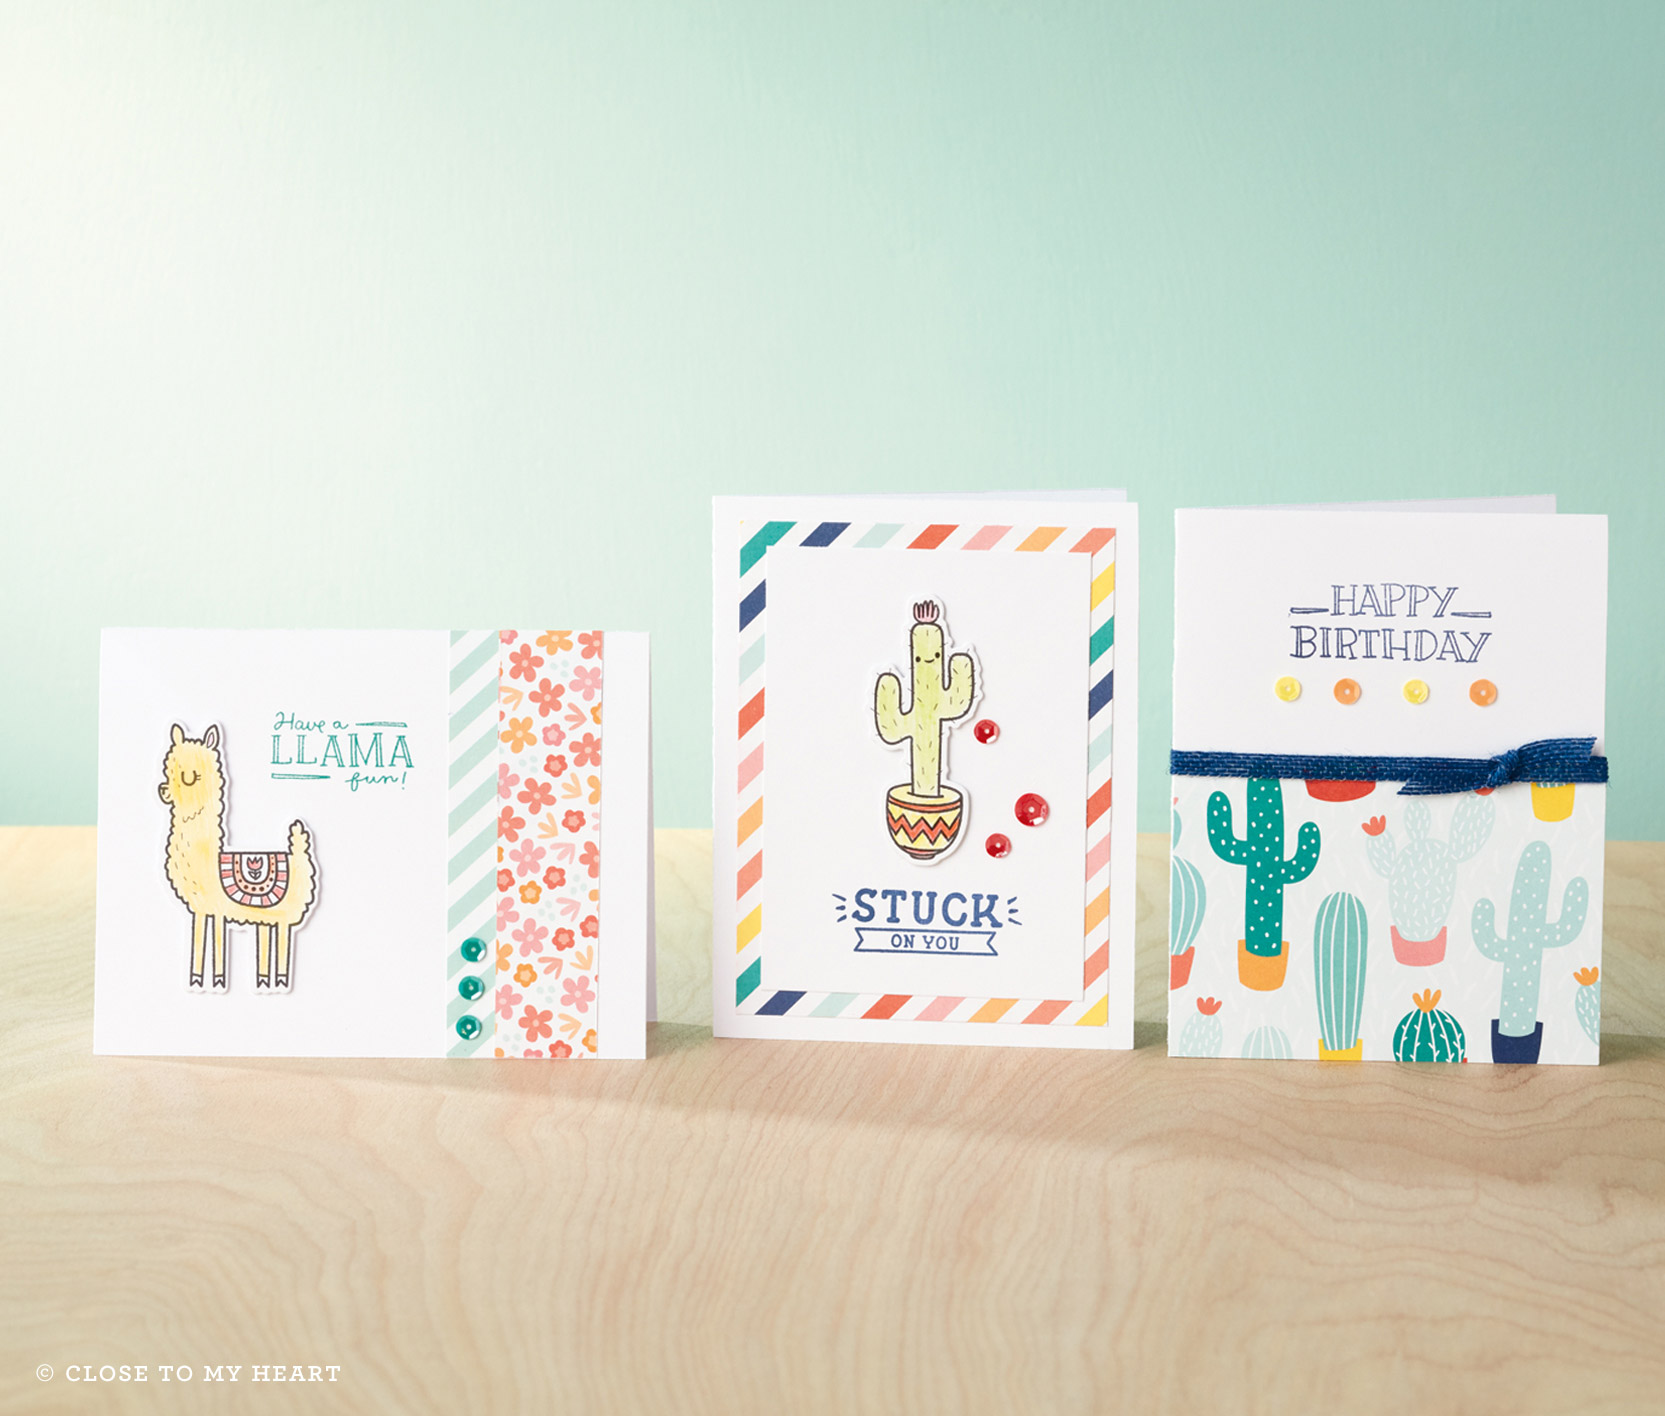 Additional Cardmaking Project: Make 12 cards, 4 of each design, using your remaining workshop materials and just a few extra supplies!
Prickly Pear Cardmaking Stamp + Thin Cuts
Archival Black Exclusive Inks Stamp Pad
Emerald Exclusive Inks Stamp Pad
Sapphire Exclusive Inks Stamp Pad
Watercolor Pencils
3-D Thin Foam Tape
White Cards & Envelopes Value Pack
Coordinating colors for this paper (cardstock and inks): Blossom, Emerald, Lemon, Poppy, Sapphire, Sea Glass, Sorbet, Tangerine, White Daisy
Other coordinating products:
Prickly Pear Coordinating Cardstock
Prickly Pear Scrapbooking Stamp + Thin Cuts
Fiesta Time Stamp Set
When you place an order of $50 or more, you get the Stamp of the Month set for only $5.
The Stamp of the Month is:
Storybook Alphabet
The current Constant Campaign is:
(July) Stampaganza! Purchase 2 stamp sets a regular price and receive a 3rd at equal or lesser value for FREE!
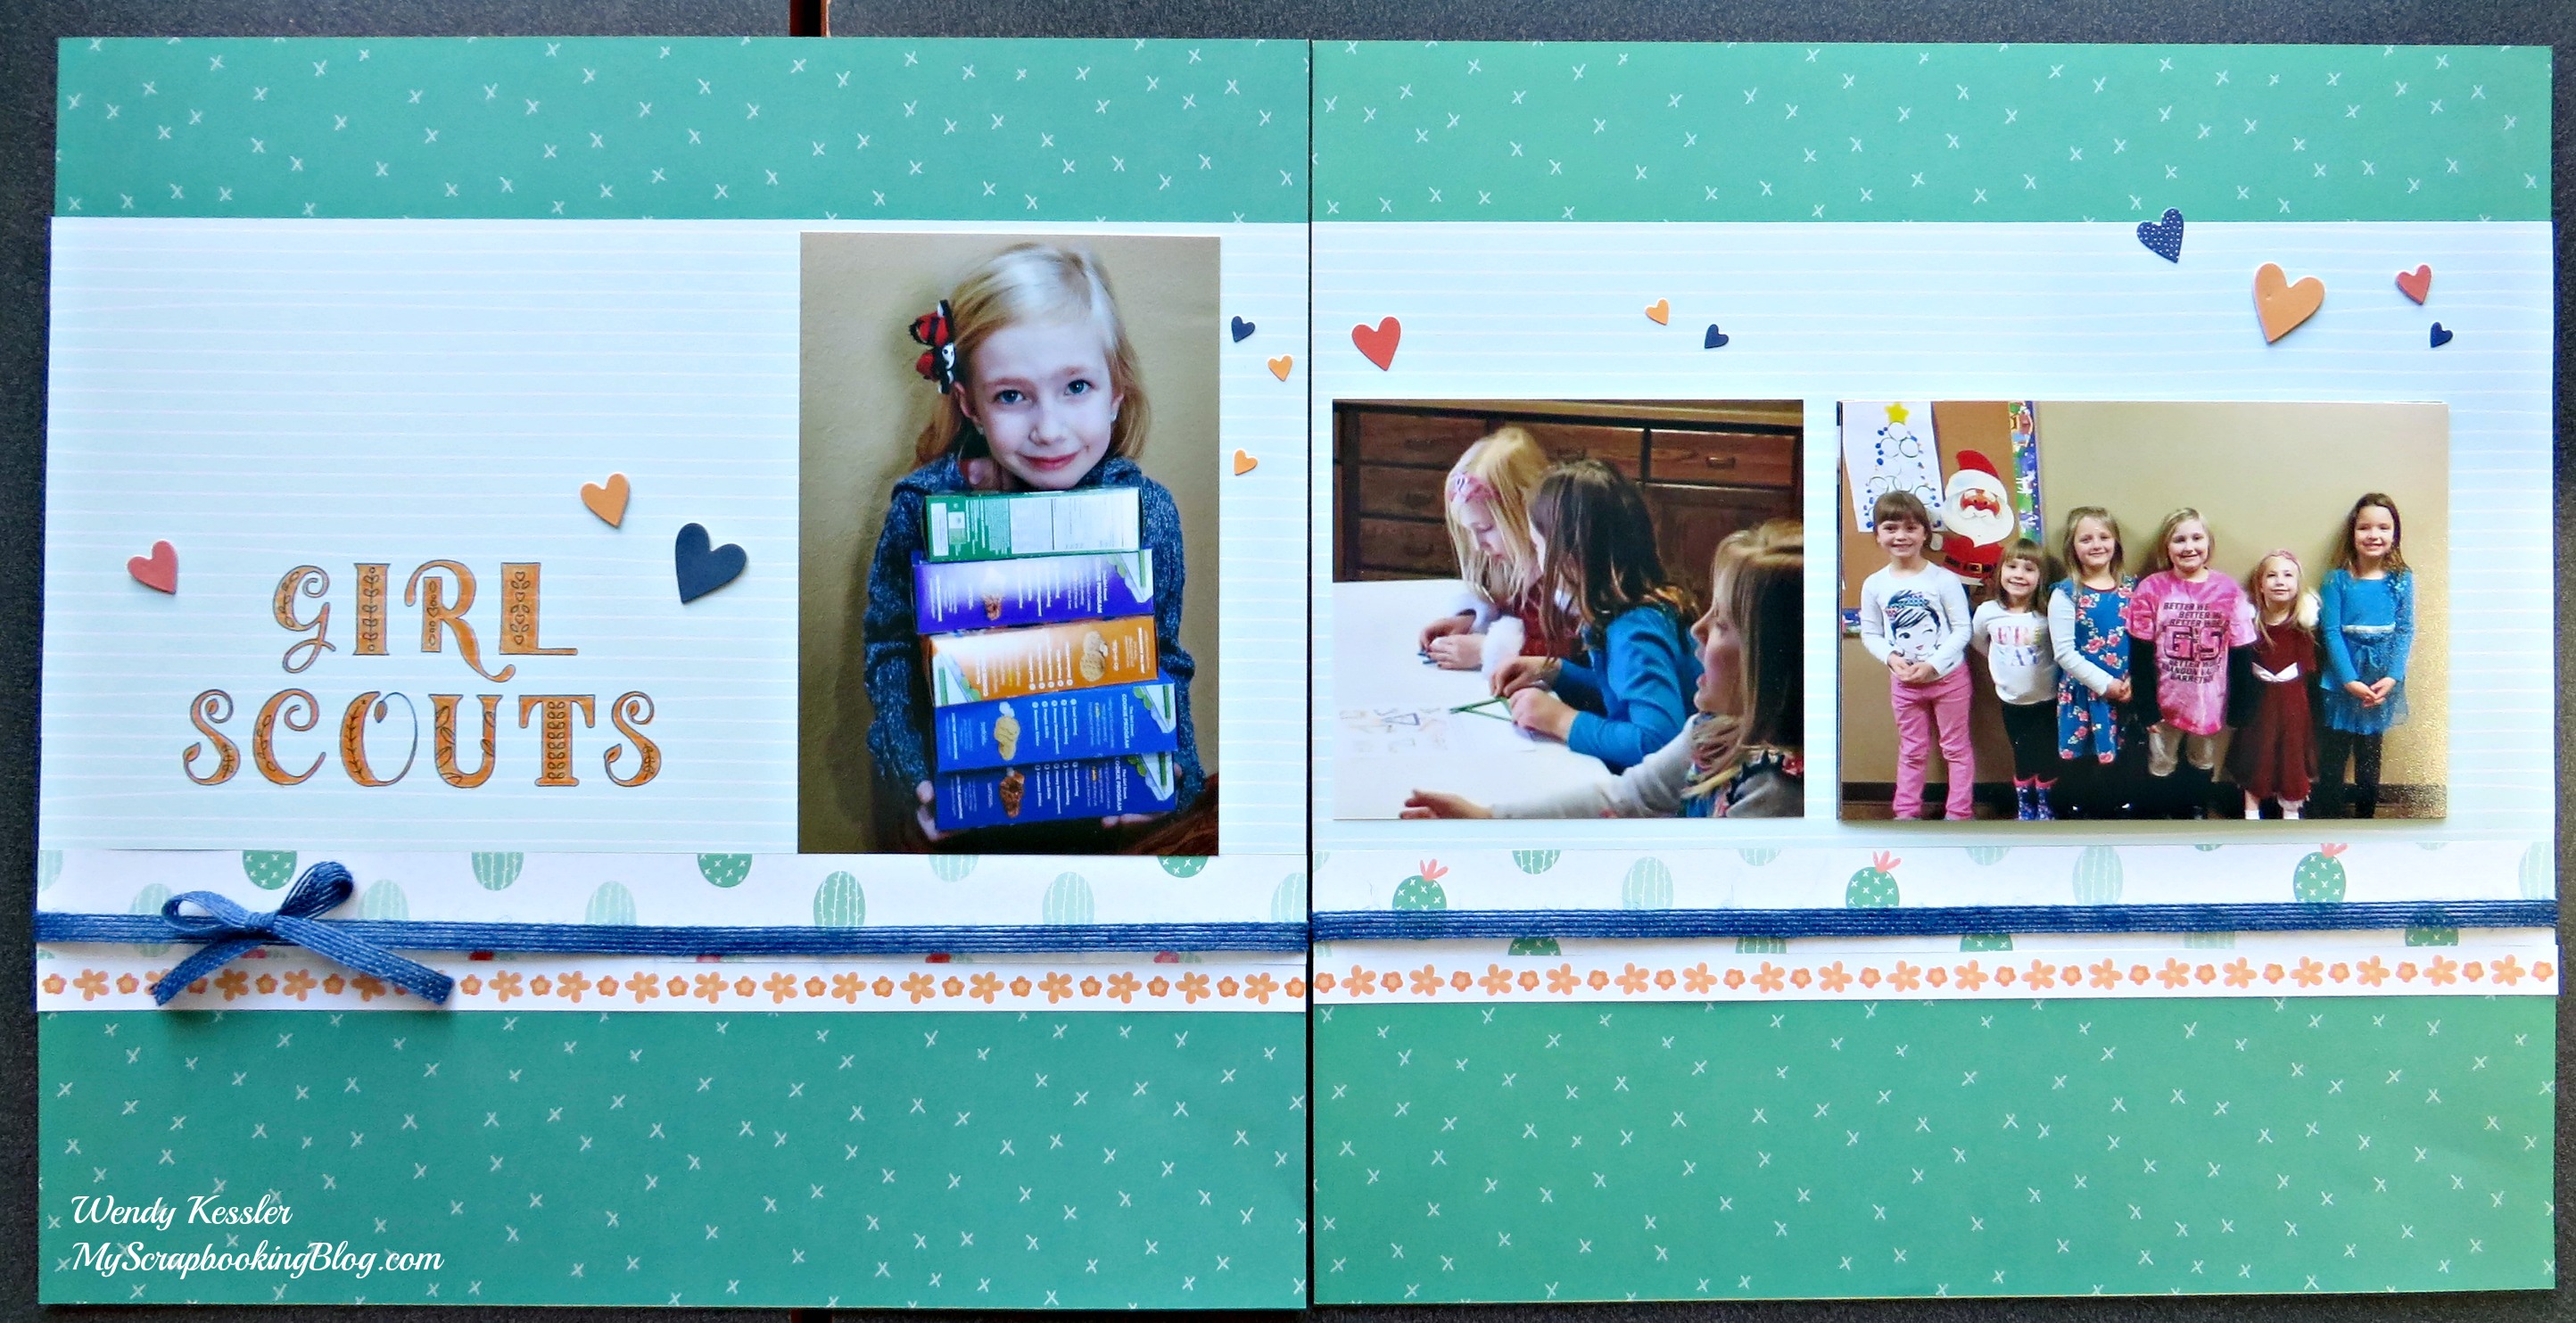
My completed projects: I used the July SOTM, Storybook Alphabet for the “Girl Scouts” title on my layout.  For the cards, I used these stamp sets: Birthday Sparkles (Sapphire Ink), Diploma Day (Sea Glass, Emerald, and Sapphire Inks), and Safari Ballet (with Poppy Ink and colored pencils).

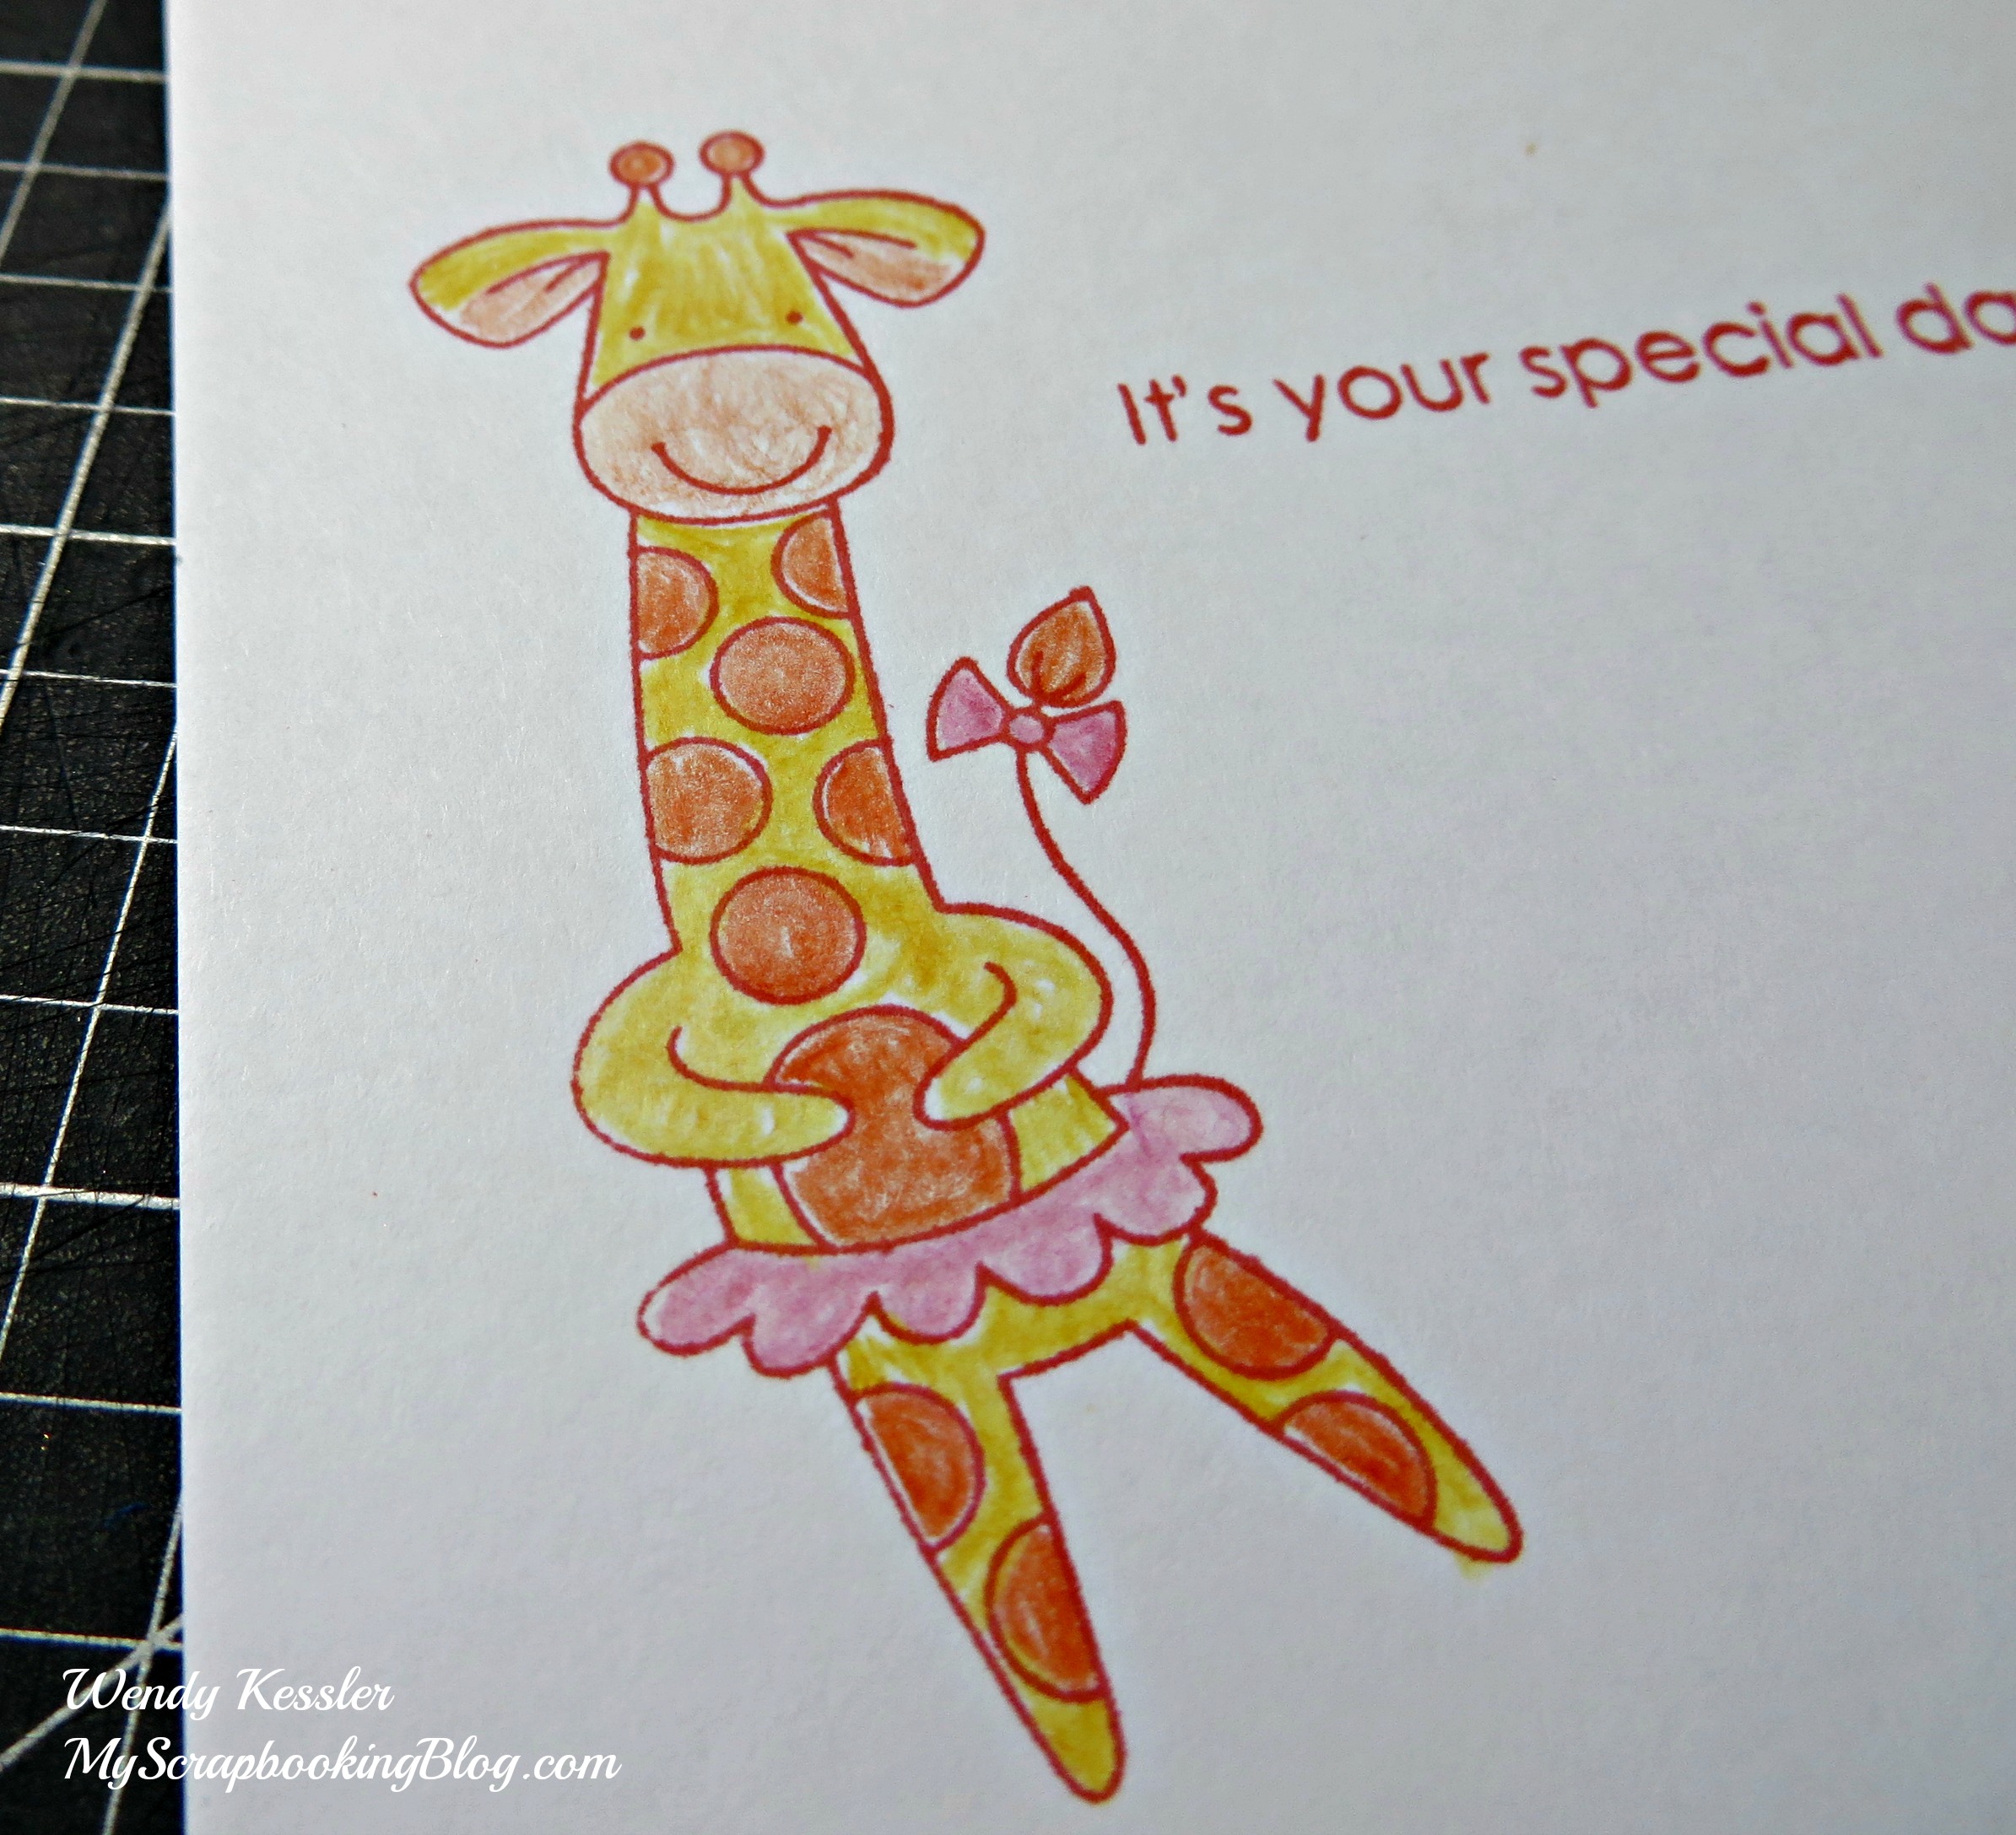
And here are some closeup pictures of the giraffe card. The first one is after I colored using the watercolor pencils.  The second picture shows after I used the Blending Pen to smooth out the coloring.  It makes a big difference! Tip: When using the blending pen, go over one color at a time and before changing colors run the brush over a scrap paper until it is clear again.


0 Comments