Close To My Heart is celebrating National Papercrafting Month with the Cloud Nine cardmaking kitâ€â€now available to you for a delightful deal! Watch the video and get excited to order your own before January melts away.
There are two ways to get the adorable Cloud Nine cardmaking kit: Purchase it for just $15 (retail value $46) with a minimum qualifying order of $35 during January in celebration of National Papercrafting Month.  Or get it FREE when you enroll as a new Consultant in January and submit total personal sales of $300 or more*.
Create 10 cute cards (2 each of 5 designs) using three sneak-peek accessories from the upcoming Idea Book, a new D-size stamp set, and exclusive papers.
Cloud Nine Card Kit Contents
1 – My Acrylix™ Cloud Nine Stamp Set (D-size)
1 – Cloud Nine B&T Duos™ Paper
1 – Lagoon Cardstock Sheet
1 – Honey Cardstock Sheet
1 – 9″ x 9½” White Daisy Die-Cuts Sheet
1 Roll – Gold Polka-Dot Washi Tapeâ€Â
1 Roll – Teal Shimmer Trimâ€Â
1 Package – Durables Triangle Studsâ€Â
10 – Card Bases & Envelopes
1 – Instructional Brochure
Featured colors: Lagoon, Sunset, Honey, White Daisy
†new product in Spring/Summer 2014 Idea Book
*New Consultant’s total qualifying sales must be remitted no later than June 30, 2014, and the free kit will automatically ship with the Consultant’s order that achieves the minimum sales, or, if that order is a customer’s OBA order, it will ship with the next order going to the Consultant’s address. Orders must be Consultant-placed and the listed shipping address must correspond to an address listed on the Consultant’s profile in their online Personal Business Assistant.
*Offer valid January 1–31, 2014. Additional criteria may apply. Tax is based on the price paid for the promotional item. Shipping/handling based on the full retail price of the card kit ($46).
Come back on January 3 for a Cloud Nine Blog Hop where you can see more uses for this card kit than just making the specifically designed cards!
This was a very quick and easy card kit!  Below are the pics of the cards as I made them, most are the same as the kit specifies.  Note that there are both gold and silver Durables Triangle Studs.  I didn’t realize this until I was working on the last card and I needed more gold.  On some cards it doesn’t matter but if if there is Washi Tape used on the card you are going to want to use the gold studs.
 Card 1 – Thanks
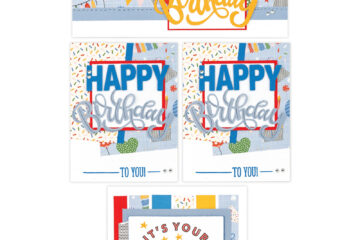
I changed this to a Happy Birthday card since I use so many of those.  I was lazy and didn’t want to mask the Happy Birthday stamp so I tried using a sponge dauber to ink the stamp.  It worked for the most part but I had a couple smudges around the edge…thus my added swirls that I made with a marker to camouflage my flaw.
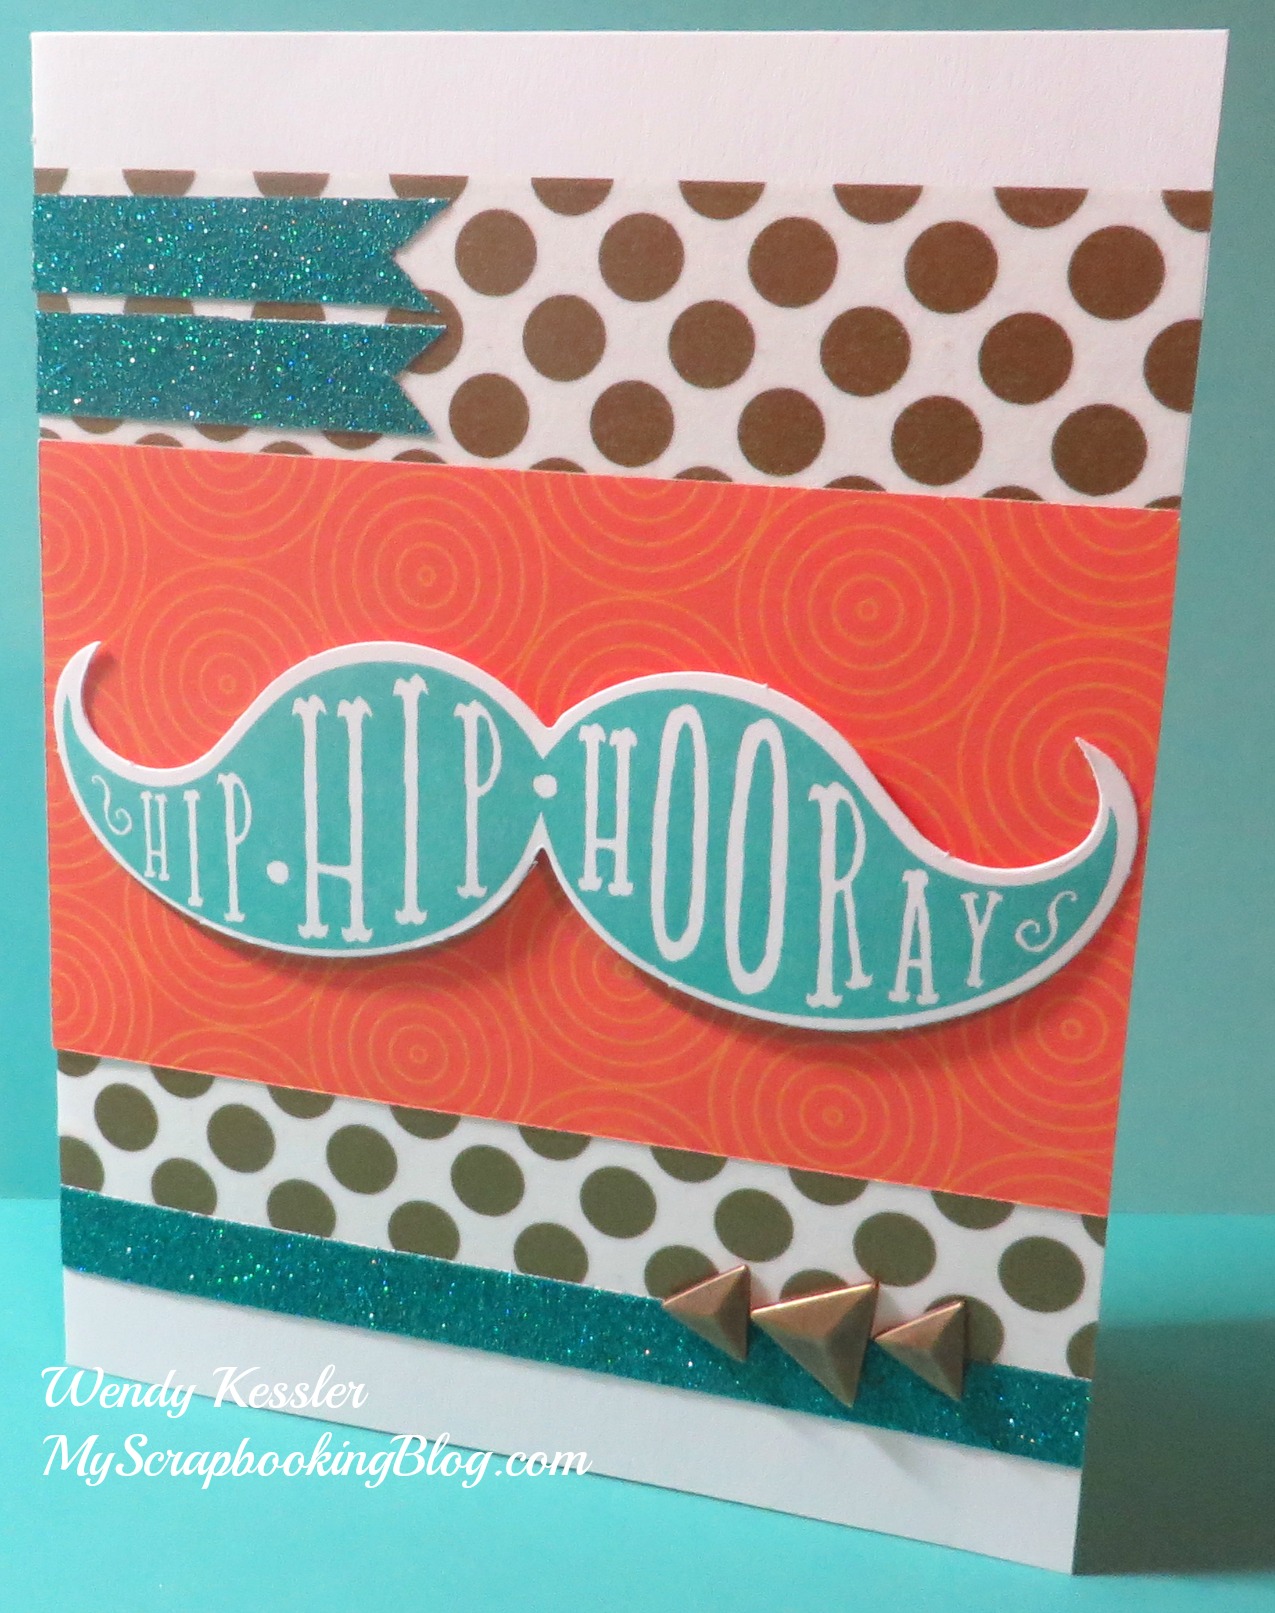 Card 2 – Hip Hip Hooray
Both times when I stamped the mustache I thought I was “off” and it turned out perfectly.  Focus on lining up the center when you stamp this one.  Also, if you want this to look exactly like the picture, you will need to attach the Washi Tape first and layer the B&T Paper overtop.  I just centered my B&T Paper and lined up the Washi Tape along the top and bottom so you can see the difference in my picture.
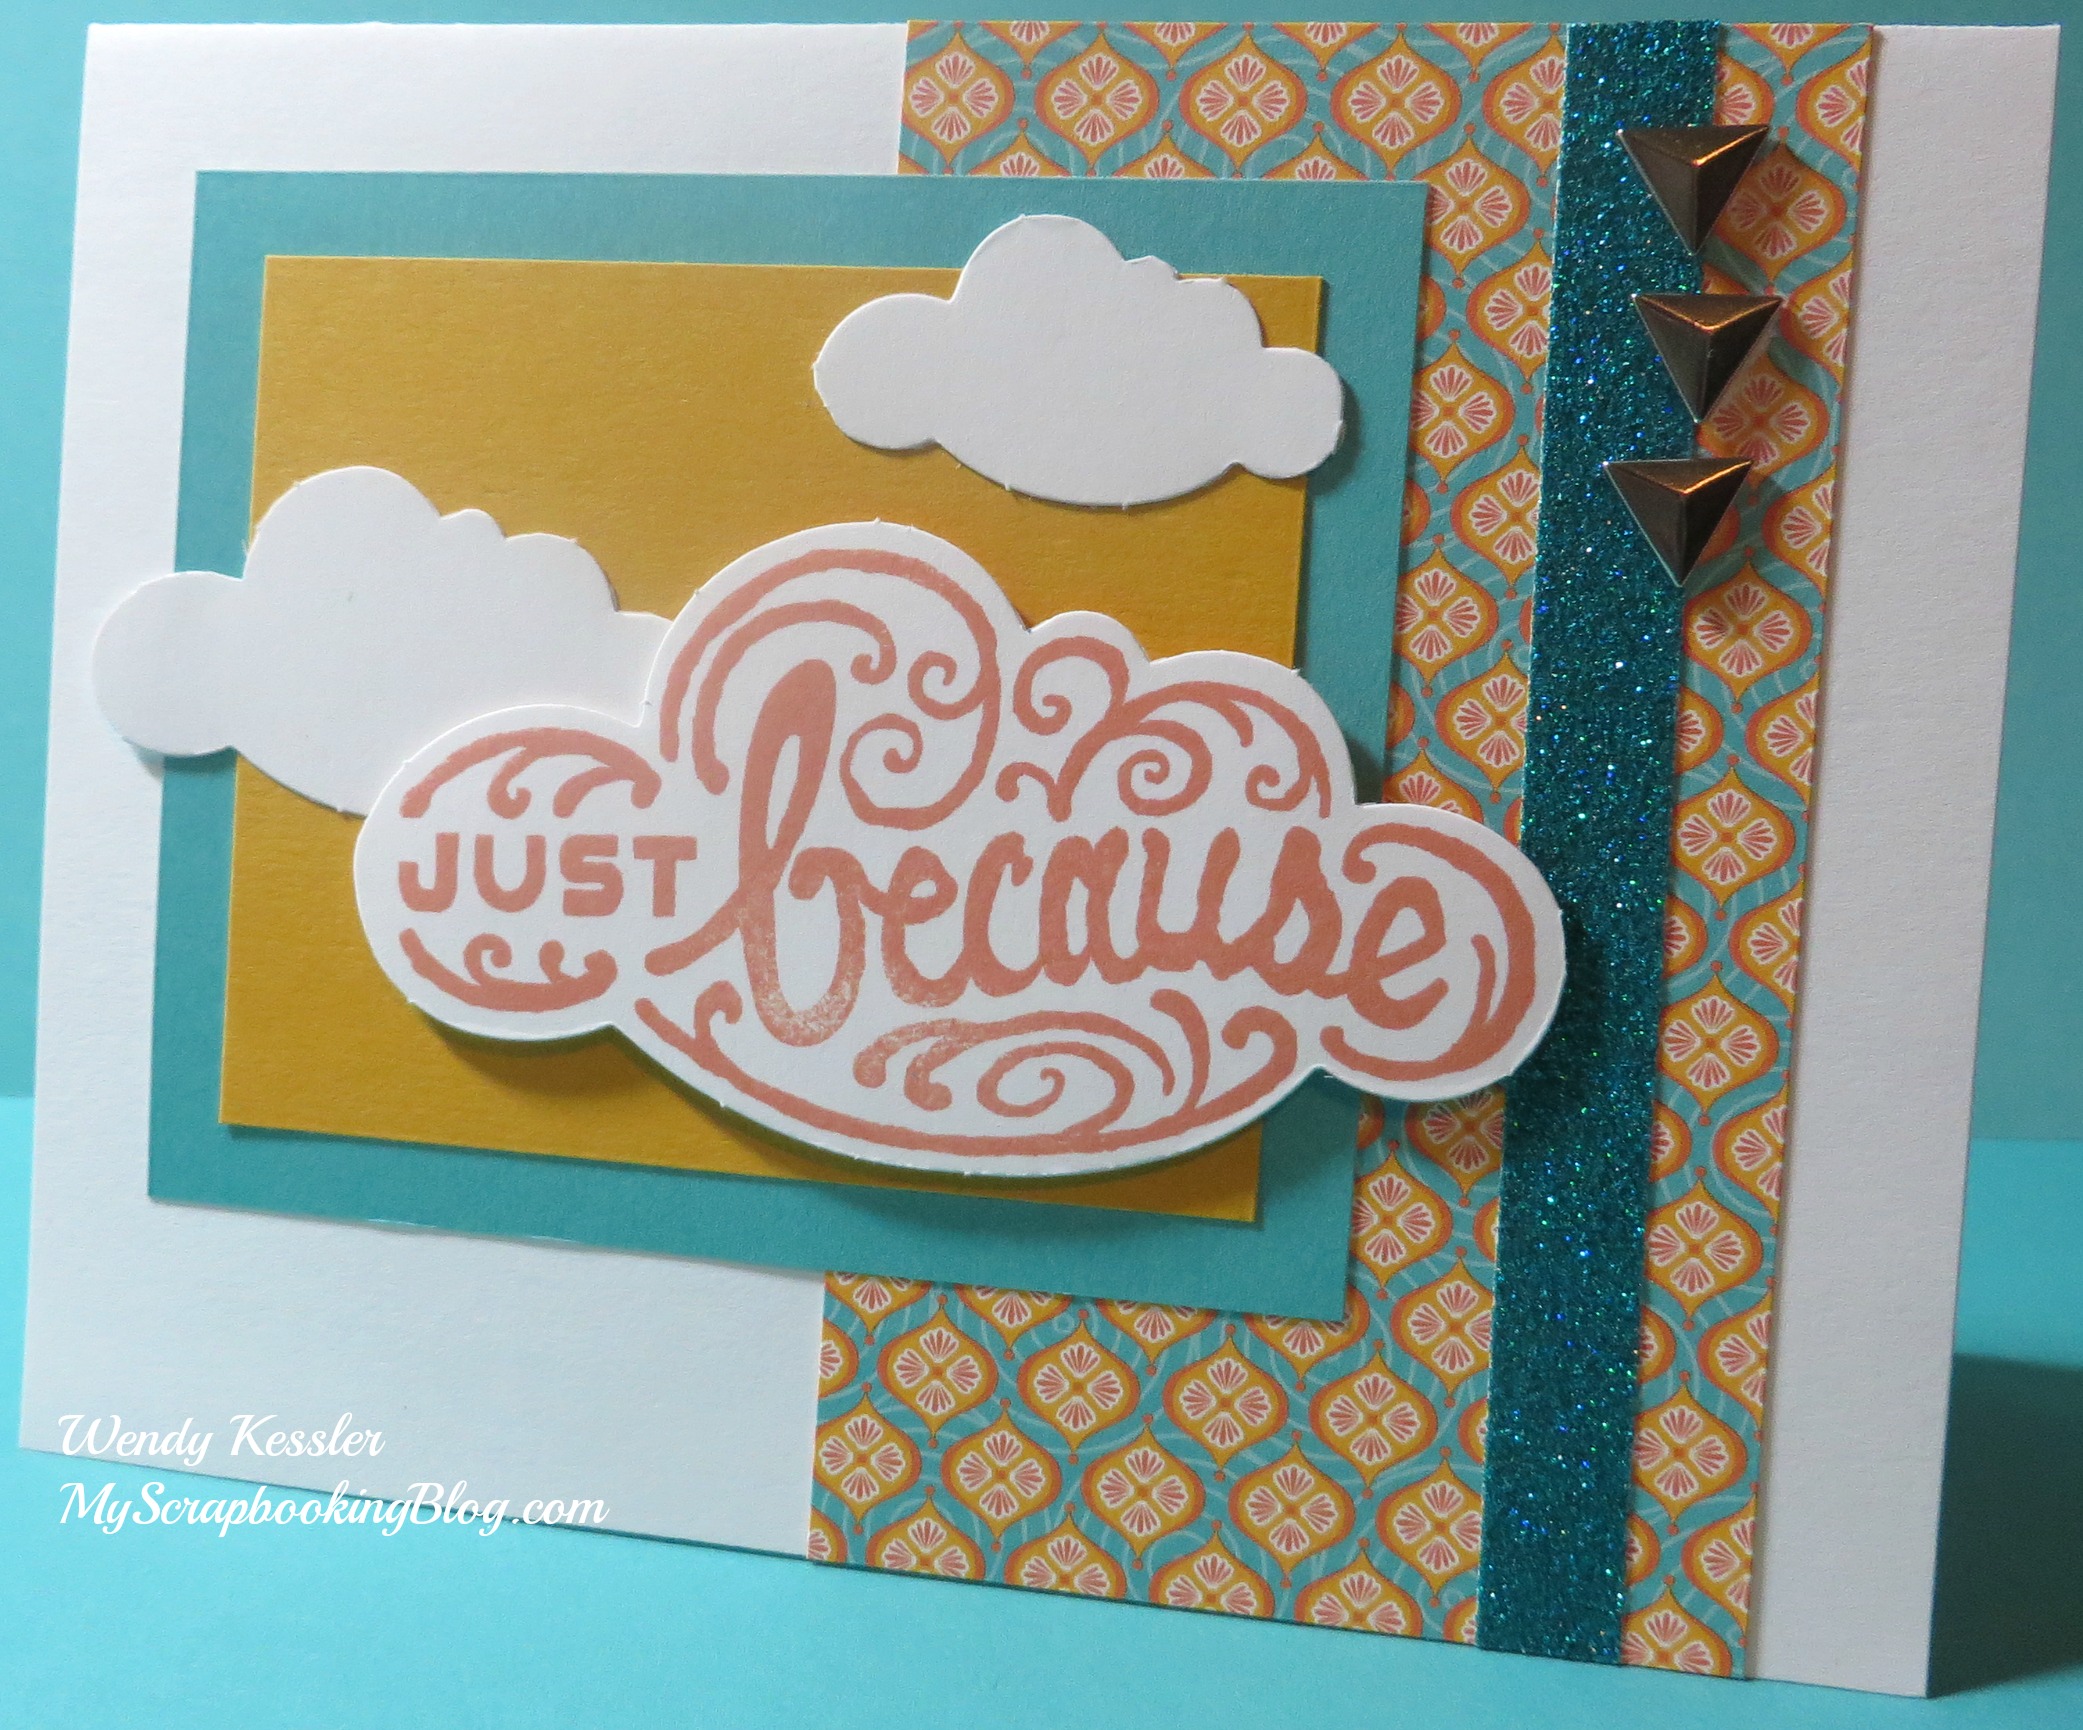 Card 3 – Just Because
 Card 4 – Happy Birthday
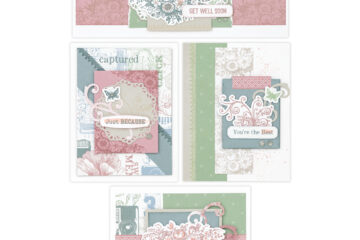
 Card 5 – Love You
A note on this one: for the big heart you only need to get good ink coverage around the edge because the center of the heart will be covered.  And make sure you stamp the smaller heart and sponge the larger one so they layer correctly.
**As a last note, when using the stamp set with the Artiste Cricut cartridge for future projects, you need to use Real Dial Size.

0 Comments