Welcome to the 2013 Spring/Summer New Product Blog Hop where you will get a great view of many of the new things that have recently been released from Close to My Heart.  Not only will you see the new product but you will be inspired with a variety of ways to use it!
The hop is a circle so if you are starting here, just continue until you make your way back.  If you have already started, you should be coming from Heather’s Blog.
The product I chose to feature today is the My Creations 6×6 Canvas Display.  It is a 6×6 canvas sheet mounted on a wood frame and has a sawtooth hanger.  I challenged myself with this project because I have never worked with canvas before.  At only $4.95, this is an inexpensive project to make for yourself or as a gift.
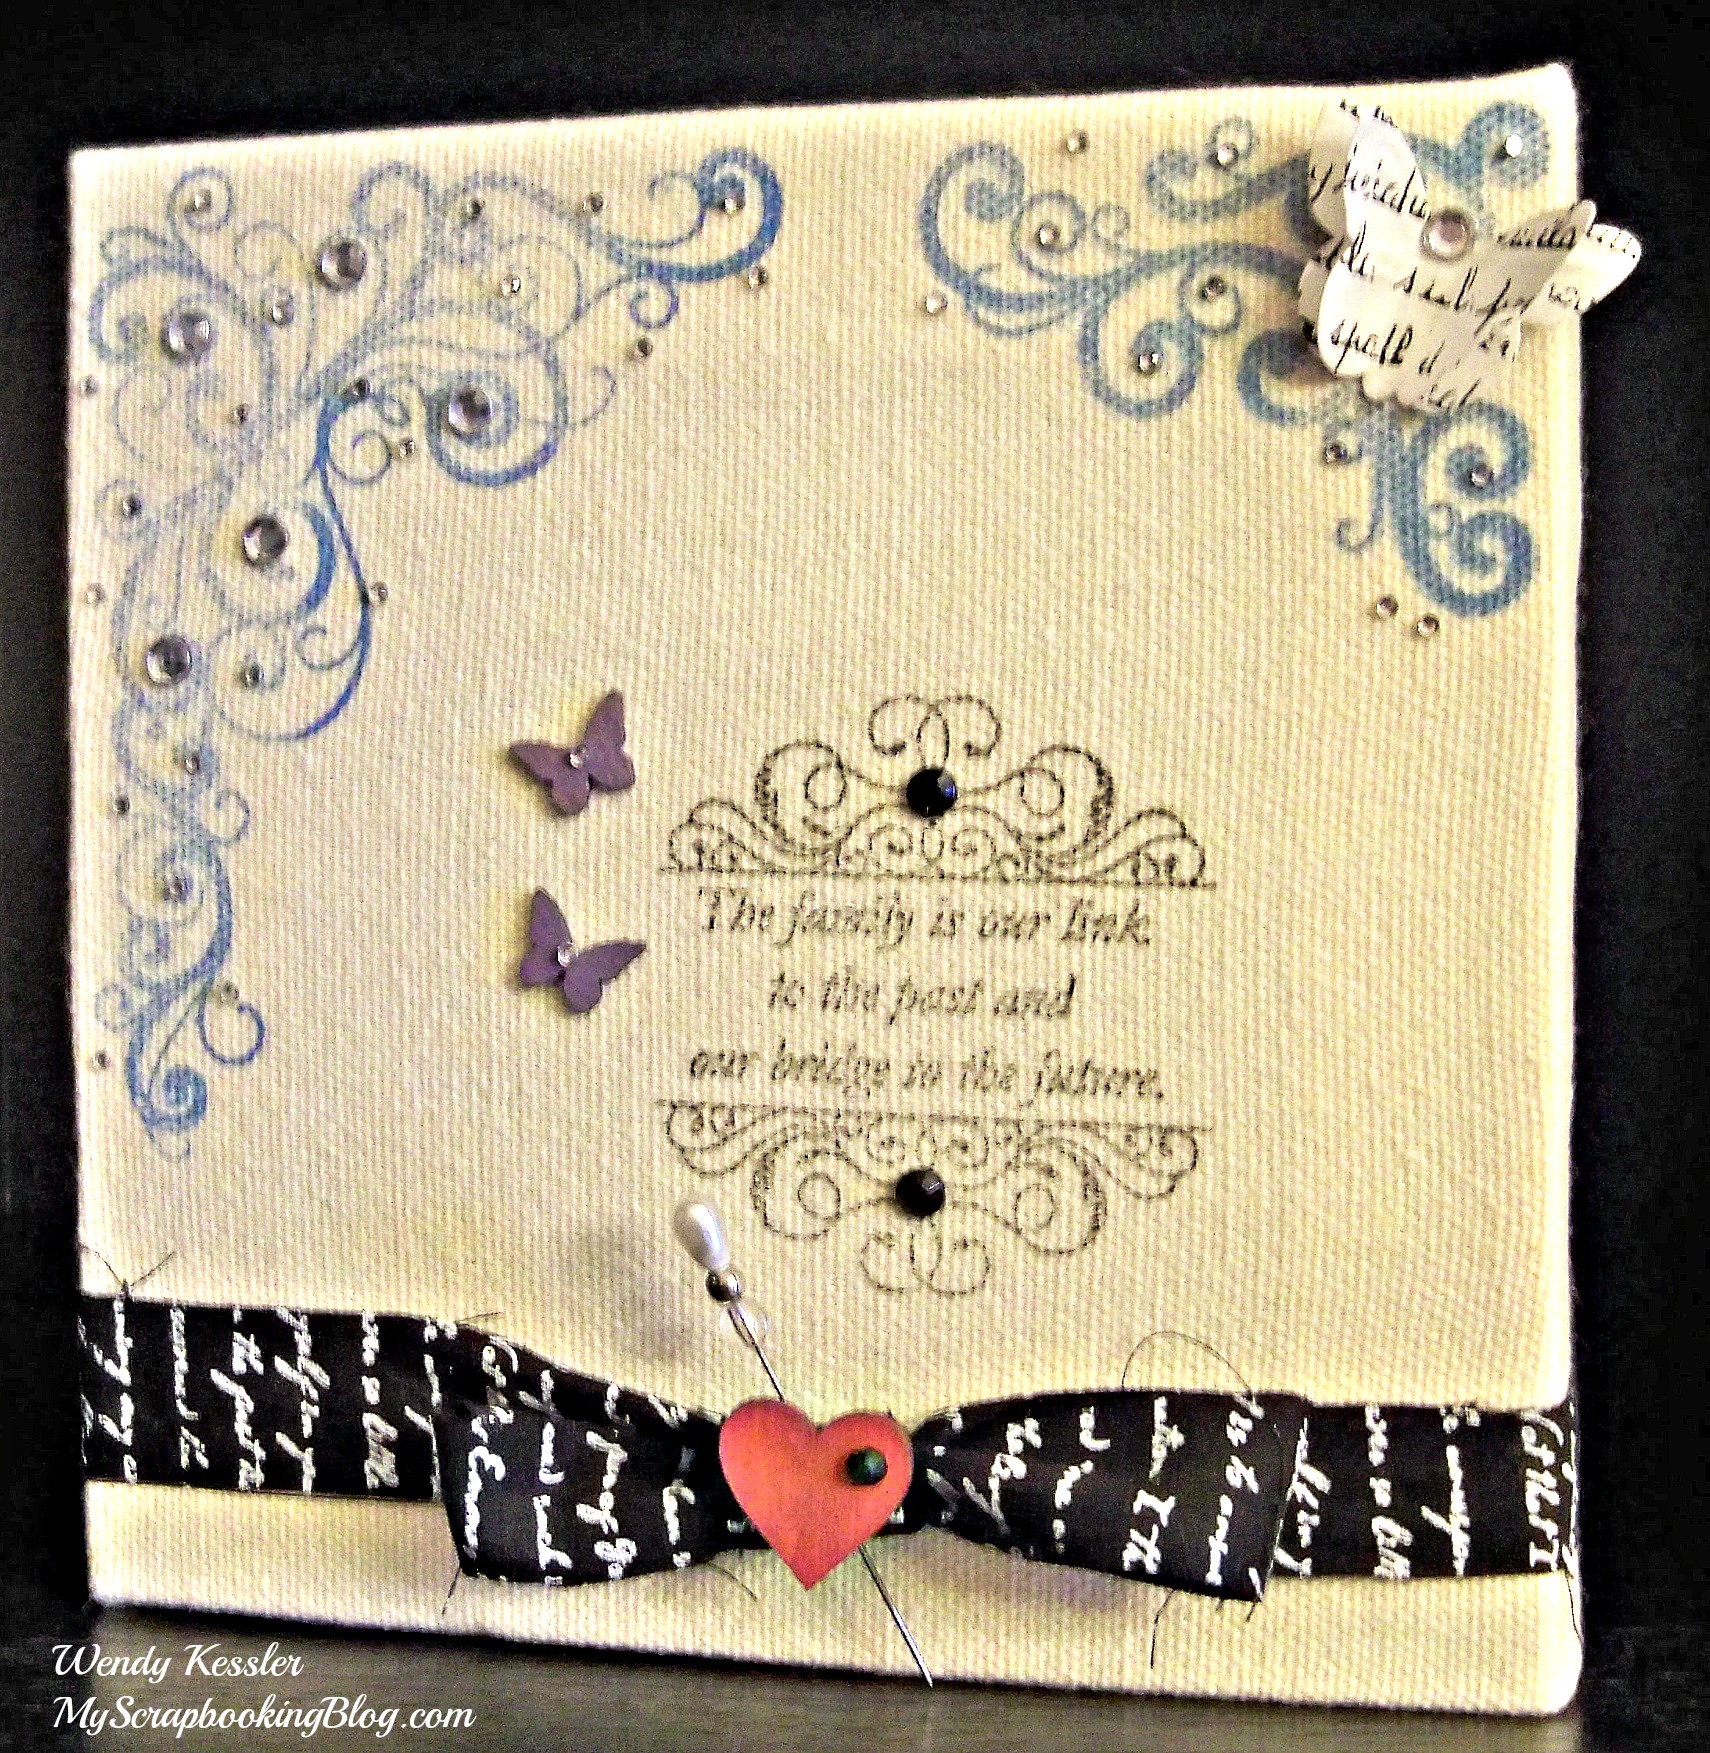
Supplies used: 6×6 My Creations Canvas Display, D1506 Family Love stamp set, C1503 The Best Things stamp set, Indian Corn Blue pigment ink, Black Pigment Ink, Color-Ready Trinkets Wooden Shapes, Ruby Pigment Ink, Smokey Plum Pigment Ink, Flutter Paper Shapes, Clear Sparkles, Bitty Sparkles, Black & Grey Sparkles Assortment, For Always Textiles.  I also added a pin from the Bling Assortment which is retired.  I just couldn’t resist but it could easily be left off or add one from the For Always Assortment.
Things I learned from this project:
* I put an acrylic block under the canvas when I stamped so I’d have a solid surface.
* If stamping, use images that are forgiving (not small words).  I figured this but had to try it and see.  The flourishes stamped pretty good but there seemed to be an area around the wood that I just wasn’t able to press the image enough to get it to stamp onto the canvas.  I covered this up on the right corner with the butterfly.  You could still use words like I did but stamp them first to cardstock so you have a nice clean, crisp image, then attach to the canvas.
* I used Liquid Glass as my adhesive.  The fabric is thin so if you use a liquid adhesive, do so sparingly.
* I used pigment ink for the entire project.  It dried well on the canvas, probably because it could soak in.  I was lazy and left the wooden pieces overnight to dry but they didn’t.  Even heat setting them took longer than normal.  So just be aware of this.  You could use the dye inks for the wooden pieces however I wanted the bright, vibrant colors that the pigment inks provide.
Now hop on over to Beth’s Blog to see her wonderful creation!
Here is a list of all the blogs in the hop:
Helen Onulak
Kathleen Androlewicz
Lucy Kelleher
Maria Myers
Joy McHargue
Maureen OSullivan
Jen Patrick
Traci Pasqualone
Melissa Robinson
Priscilla Gotham
Judy Faye Garner
Haley Dyer
Heather Schmuckal
Wendy Kessler   <-- You are here.
Beth Naumann
Allisa Chilton
Pamela Ellison
Jody Gustafson
Terry Ann Diack
Tamytha Jenkins
Georgia Hauglid
Krista Hershberger
Dawn Ross
Wendy Coffman
Laurie Newton
Traci Godbee
Elizabeth Mindemannn
Mary Eisen
Melinda Everitt
Michelle Johns
Nikka geers (no post)	http://Nikkageers.blogspot.com
Michelle Loncar
Gina Brandstetter
Sheila Bennett
Misty Jackson

2 Comments
Judy Faye Garner · 02/14/2013 at 9:02 pm
Lovely project and thanks for sharing what you learned.
Haley D. · 02/15/2013 at 8:57 pm
Great project! Thanks for sharing your tips & tricks!